Website powered by

The perks and pitfalls of being a 3D architectural visualizer

General / 17 January 2023

Being a 3D artist can be one of the best occupations out there — a perfect mixture of creativity and technical work. The industry is constantly changing, keeping veteran artists interested and opening doors for new artists to find their place.

However, working in the 3D industry also can be challenging. The job's demands can take a toll on even the best artists… I've worked as a professional 3D artist for the past ten years, working as everything from a 3D architecture visualizer to my current role as a 3D creature artist. Not every day has been inspiring, nor can I say I haven't considered leaving the industry at some point in my career. But, like many artists, passion has driven my career. I love logging on to work on new projects in 3D and creating incredible images using little more than a computer. Clicking render to have a photo-real image appear that I created gives a tangible satisfaction that no other jobs have provided me. In this article, I'll look at both sides of the job: the perks and the pitfalls. I hope to give an honest picture of life in the CG arts and 3D architecture visualization industry.

If you are looking to get into the industry and have yet to check out our render farm services, we offer $50 of free render credits to artists new to our platform. Feel free to check us out and start rendering for free. A low-cost rendering service, especially for new artists taking on work, is essential for diverging work in a timely manner without owning your own high-end rendering equipment.

The perks

One of the greatest perks of being a 3D architecture visualizer is that there are always new tools and workflows to learn. The fast-paced evolution of 3D software and tools helps the job to always feel fresh and exciting. For example, recent improvements in real-time rendering with Unreal Engine have allowed me to explore new ways to develop and render both new and old projects interactively. Other tools like 3D scanned assets and instancing tools have allowed freelance artists to realize incredible scenes that would have taken entire teams to create in the past. Taking advantage of these cutting-edge technologies as an artist has excellent value and provides a sense of empowerment for reaching artistic pursuits.

Credit: Medea Dzagnidz / Unsplash

 The pace of the industry also brings along constant room for improvement for eager artists. Whether learning python scripting, improving your artistic style, or using a new tool, no matter what you do as a 3D architecture visualizer, there are always ways to improve your work. The opportunities allow artists to gain self-satisfaction while also meeting career goals.

Apart from personal aspirations, the career benefits that archviz brings are also very attractive. More than ever, 3D is creeping into every industry bringing more jobs to the field and new ways for artists in the industry to explore their interests. While still competitive (more on that later), new jobs in AR, machine learning, and 3D architecture visualization, in general, lend to more job security than many other 3D or creative jobs in VFX or product design.

Credit: Don Kaveen / Unsplash

 Since the covid-19 pandemic, remote work has become the new normal for many, including those working in 3D architecture visualization. This can also be a huge perk for those in the industry. Because archviz projects tend to have smaller teams and already relied heavily on outside freelancers before the pandemic, virtual collaboration is now a vital aspect of many archviz studios. This can help artists find a better work/life balance and eliminate the costs and time of a commute. Personally, I’ve worked my entire career in the 3D industry remotely.

The pitfalls

As you can see, working as a 3D architecture visualizer can have many perks, but that doesn't mean the career is accessible or even always desirable for some. Burnout is real and far too familiar in the industry that we'd often like to admit. The repetitive nature of many architectural projects can leave artists feeling underutilized, especially if deadlines are too tight to fully explore a project creatively. The portfolios of top 3D architecture visualizers and firms often portray a wealth of exciting and diverse projects. Yet, the truth is that many projects will feel dull unless you have the reputation and client base to be picky about the work you choose to do. Especially as an entry-level artist, it can be a disappointment to be stuck working on yet another office complex visualization.

Credit: Nuddle / Unsplash

Competition among 3D artists is also fiercer than ever. In the past, technical expertise alone could land a lucrative job in archviz. But as tools have developed and the barrier of entry has lowered, more entry-level artists are looking for work than ever. Ideal candidates for even non-senior positions are expected to have high technical and creative experience in many disciplines and a robust portfolio of work. Jobs require experience in artistic principles, modeling, lighting, scripting, and even animation. And with lower budgets and more tools to automate workflows, many studios and freelancers are expected to complete major projects with smaller teams and faster deadlines. 

Credit: Alona Gross / Unsplash

Lastly, those who already have strong careers as architecture visualizers face higher and higher expectations of speed and ability. The flip side of a growing industry is that studios are taking on more work, placing more pressure on their teams. As I mentioned, burnout is a real concern for artists working in architecture visualization. Competition and a work-first culture lead many creatives to develop adversarial relationships with their work. Passion and drive are often used as ammunition for studios and clients to push artists past reasonable expectations and deadlines. Obviously, these concerns don't apply to all studios or freelancers, but the concern is worth being aware of.

Conclusion

The demands and challenges of working in architecture visualization are real. However, as long as you have a passion for what you do, the pitfalls are worth the perks of being a 3D artist and 3D architecture visualizer. Few things are more satisfying than sending your final renders to be used and published. Further, as long as you maintain a healthy relationship with your work, it can be one of the most enjoyable day-to-day jobs. Working on modeling one day to lighting and writing scripts the next day offers variation and room for growth at almost every turn.

---

by Johnson Martin

Originally published at https://garagefarm.net.

Magic in motion: Marina Nakagawa and her mastery of motion graphics

General / 29 December 2022

If there’s a word that can describe Marina Nakagawa’s unmistakable aesthetic, it’s joy. Looking at the snapshot below from her NFT art called Night Garden, Marina’s choice of colors, how she puts a certain softness to the light, the cuddly texture on the little fireflies' bodies, the expression on their faces – all these come together to capture the essence of a smile and put it on screen as a visual.

Night Garden / Marina Nakagawa

(If you’re unfamiliar with NFT art, learn more about it here.)

Marina’s touch has a certain innocence to it that even a music video for a rap song can get a comic-book treatment without it becoming corny:

Kaci Brookz/ Animation: Marina Nakagawa

Marina’s work can be whimsical but never weird, colorful and child-like but never gaudy and childish, emotional and poetic, but never cynical: 


(Got a project in Cinema 4D that you need to render? Get started here.)

Marina’s background

Where could Marina’s aesthetic have come from, one wonders? It could be from her upbringing in Japan; the Japanese are known for a certain quiet, unique, understated style when it comes to design. They are also known for being dedicated craftspeople no matter the craft; the insistence on excellence and attention to detail is clearly evident in Marina’s work.

Perhaps it came from those whimsical and surreal MTV station IDs she saw during her teens. Those could be pretty random, fantastical, and unpredictable; they could have opened Marina’s mind to a certain nonlinear and nonliteral way of expression.

Most likely, it’s a combination of all that plus her continuing work in the UK where she moved after getting married in 2016. She has done a lot of animation work there, from when she first joined an advertising-related studio to when she decided to go freelance in 2019. 

Surely no one thing’s responsible for defining such a nuanced style as Marina’s. The one thing that’s for sure is that her style is a delight to behold.

Marina x GarageFarm

Marina first worked with GarageFarm rather serendipitously. A client once asked her to render a large image for an event, and the client needed it ASAP. Marina admits to not being the most technical person around, so she needed a rendering solution that’s as simple and intuitive as can be. She took a quick look around and tried GarageFarm.

She never looked back. “It was great that it was very easy to understand, such as downloading plug-ins and rendering operations on the web. Also, the support is very responsive. I got a reply as soon as I asked a question, and if an error occurred, I immediately checked the file and responded, so it was really helpful,” said Marina.

For her, speed is the major draw in using an online render farm such as GarageFarm. Remember the first image at the top of this article? That image comes from a looped video that’s 11 seconds long. That animation has a total of 264 frames of multiple light sources and surfaces made of transparent materials. Based on Marina’s computations, it would have taken at least 4 days to render the whole project using her own computer. Using GarageFarm, the project was rendered in a matter of hours.

The making of Night Garden / Marina Nakagawa

While speed was the major draw, the support made Marina come back. Rendering is always a complicated process with lots of moving parts and something is bound to go wrong somewhere at some point. Having a team closely monitoring your project as it is being rendered is a huge time-, cost-, and sanity-saver.

“I was a little nervous about whether I could actually get the results I wanted, whether the textures and plugins would not break links, and whether they would render exactly the same on the farm. I think it's a feeling like a graphic designer printing a work at a printing shop,” said Marina, describing her early days with GarageFarm. “However, when I actually used it, even if I had a problem, the support was really quick to respond and the result was as expected, so I'm really glad I used it, and I will continue to use it when it’s necessary.”

What excites Marina about the future

Marina is excited about how free yet quality software such as Blender and Unreal are opening up the craft of CGI development to more and more people, especially young people. Combine this with the fact that working remotely is now more effective and more accepted than ever, and a truly global community of artists is possible.

“I believe that Japanese artists will be able to spread their wings to the world, transcending language and physical barriers,” said Marina.

Marina sees potential in AR and the metaverse, and this led her to exhibit some work she did using the GLTF format for the first time. “[While] I felt that there were still restrictions in the expression of materials and lighting, I think that It will allow us to create more sophisticated expressions in the future, and if that happens, I think that more interesting content will appear,” said Marina.  

Mass Effect animated sticker (client: Valve Software/EA) / Marina Nakagawa

If you’ve noticed in Marina’s reel at the top of this article, she works not just with 3D but also 2D. Here, Marina sees a lot of exciting potential as well. She feels that the combination of 3D with 2D leads to unique expressions that are not possible otherwise. “Since the release of Spider-Verse in 2018, expressions that combine 3D and 2D have become very popular. I think there will be a sudden increase in the number of works that are artistic and unique expressions in the next few years. I think this trend will continue for some time to come,” said Marina. 

Marina observed that while animation is a medium that has long been enjoyed by people of all ages in Japan for a long time now, the same couldn’t exactly be said for Europe and the US. In those cultures, there has always been in the past an assumption, or at least a bias, that animation is for children. Not so anymore in recent years. “There are more animations that can be enjoyed in the previous generation that incorporate more artistic expression, and not only the evolution of visuals, but also the story is much more for adults,” Marina explained. She sees this trend continuing in the foreseeable future.  

As for her own work, Marina sees herself exploring creating longer films and animations. “I've been making works in short formats of 10 seconds or less, but I would like to challenge myself,” said Marina.

We may not be sure if Marina’s next work will be short or long, but we’re sure it’ll be magical.    

Marina primarily uses Cinema 4D, Substance Designer, ZBrush, After Effects, and Redshift. To see more of her work, visit her website, her Instagram, and her Twitter.

---

Originally published at https://garagefarm.net.

Cutting costs with free render farm services

General / 21 December 2022

Rendering can be expensive. Whether you're used to investing in your own rendering hardware or buying render credits for your favorite render farm, the appeal of a free way to render projects is an irresistible prospect. Even though most studios and freelancers budget in rendering costs for projects, saving some of your rendering budget can still be a great way to cut costs. 

Throughout the years, many alternatives have appeared for low-cost or free rendering, including free render farms. In this article, we'll go over some of those alternatives and discuss the advantages and caveats free render farms can bring.

Crowdsourced rendering

Using a crowdsourced render farm is one of the best ways to render for free. Crowdsourced render farms rely on people donating their computer resources for others to use while they are not using their computers. These sorts of free render farms usually work using a points system that awards render resources whenever you donate your own computer’s processing power. Contributing your hardware resources over time at night or when your computer is idle, you can build up points to render your own projects quickly when the time comes.

Credit: Thomas Werneken / Unsplash

‍SheepIt is one of the most popular and long-standing crowdsourced and free render farms available. Unlike many free services, SheepIt has stood the test of time, rendering over 250 million frames for its users. The render farm is a testament to the best that free rendering can be, offering almost 24/7 uptime and relatively fast rendering considering the nature of the platform.

The downside, however, is the limited support the farm provides. Not only does the farm only support Blender projects rendering with Eevee or Cycles renderers, but it also lacks any formalized professional support if something goes wrong. For personal projects, this might not be a big deal, but for projects with deadlines, a lack of any real customer support can turn into a significant problem if it delays your client's deliverables.

Free rendering initiatives

Alongside crowdsourced rendering, there are some other less-straightforward ways to render projects for free. Sponsored rendering or free rendering programs for artists are relatively common if you keep your eye out. Be it an organization offering to cover the rendering costs for your project, grants, or a render farm offering free credits to those creating meaningful animations, having a sponsor for your project is a great way to render cheaply without sacrificing the speed and support of commercial render farms. This is especially true for fine artists or those working on social activism projects.

For example, we will often sponsor interesting projects here on our own online render farm, artists, and animations in exchange for citing our services in the project’s credits or participating in a case study for our blog. Additionally, we always offer $50 of free render credit for artists new to our platform. These sorts of marketing trades are fairly common, so it’s always worth reaching out to your favorite render farm about a potential collaboration.

Credit: Philip Oroni / Unsplash

Another example is Renderfarm.ro, while not a free render farm, they are known for offering free credit to non-profit projects organizations and offering unlimited test renders at 1024px resolution for other users. During the covid-19 pandemic, the farm started the #FREERENDER program that offered ample amounts of free render credit to the 3D community to allow artists to create without worrying about render costs.

Supporting most major render engines, including Arnold, Corona, Cycles, Redshift, and V-Ray, the program is a great example of how free, well-supported rendering is possible but can take some effort to put into action. However, while these perks are great for NGOs, non-profits, and artists looking to render their own work, the truth is, for professional artists, the advantages of such offers are limited. Free test rendering can save some costs when preparing a project for online rendering, but the perk isn't a silver bullet.

Credit: Vimal Saran / Unsplash

The caveats of free rendering

One of the largest caveats of free render farms is the inconsistency of their speed. Crowdsourced distributed rendering, for example, relies entirely on the number of clients connected to the service. Meaning render speeds can change not only by the day but by the hour or minute, causing unpredictable delays. For many, this can be a deal breaker, as one of the key benefits of rendering on a farm is being able to render quicker than you might be able to on your own computer.

Another caveat is that free render farms tend to come and go quickly, meaning you can never fully rely on services being available year-by-year. For example, renderfarm.fi was a major free render farm for years until it suddenly shut down. Sadly, this appears to be a status quo for free render services due to the complexity and costs of keeping render services online.

Security is another major consideration. An inherent aspect of crowdsourced render farms, especially, is a lack of security for files uploaded to the farms. Most professional work in the industry is typically covered under a non-disclosure agreement which prevents releasing any project data to the public. However, with crowdsourcing, it's tough to comply with an NDA because render files are sent directly to other users' computers. While some crowdsourced render farms hide rendered images from render hosts, it can be difficult to hide all aspects of a project 100%.

Credit: Anwar Hakim / Unsplash

Lastly, most free render farms lack strong customer support options, mostly relying on volunteers or part-time developers to support the systems required for rendering. This means that should something go wrong during rendering, there are few options for recourse.

Conclusion

Free render farms can be a godsend for those who don't have a budget at the moment, but the many caveats of using free services need to be considered. In many cases, a lack of support and speed can translate to hidden costs in terms of time and additional work monitoring renders and manually setting up projects to render on those farms. That being said, it's good to know what paid options are available and how these implicit costs can be reduced.

Many render farms offer professional support and quick render times without being overly expensive for even small freelance projects. Render farms like RenderStreet or RenderPool offer subscription-based plans that allow unlimited rendering for artists on a budget. Furthermore, services like Chaos Cloud for V-Ray, Fox Render Farm, or our render farm here at GarageFarm.NET provide generous amounts of free render credit to get started on projects while offering top-of-the-line customer support. Paid render farms also tend to support a wider range of software and render engines.

If you're interested in using our render services for anything from After Effects animations to Maya projects, you can visit us at GarageFarm.NET for up to $50 of free render credit to get you started rendering in a pinch.

---

Originally published at https://garagefarm.net.

What is 3D rendering for the learning 3D artist?

General / 15 December 2022

We often use the term 3D rendering to describe the entire process behind producing 3D artwork, which serves us well when trying to communicate what we do concisely to the layperson. Still, for those in the early phases of learning 3D, making some distinctions can do wonders for their progress. 

In my early years of studying 3D, for example, I put most of my focus on learning to make models. As far as I was concerned, 3D rendering just turned those models into images. Later on, I became more acquainted with the concepts of texturing, lighting, and composition, and in that time, while my renders were noticeably improving, I soon reached a plateau. No matter how detailed my models and textures were, the final image lacked something. I would see other renders online that featured simple subject matter and were still more visually impressive than any character render I ever made. Eventually, I realized the missing ingredient was somewhere in the domain of rendering. 

So what is 3D rendering exactly? What is the difference between 3D rendering and 3D modeling, texturing lighting, and so on?

Just as a traditional artist understands the term rendering as the careful articulation of light on form, texture, and detail, so too must we regard the rendering process not only as a computational process for our render engines but as the stage where we work to gel all of our elements together into a cohesive and believable image (or sequence). In this article, we’ll go over both sides to better understand this sometimes underinvestigated stage (at least among beginners) of 3D production.

3D rendering as a computational process

How does 3D rendering work? (an extremely oversimplified and reductive explanation)

There are different methods our 3D programs create the final image. Some are deprecated while others continue to be developed because of the advantages they offer to the different kinds of media 3D applies to. The two most prominent methods today are:

‍Offline Path Tracing- where an algorithm calculates all light rays in a scene through a mathematical process called integration. The light is further calculated as it hits an object's material surface, determining how much light makes it to the camera. This is an oversimplification of the process, but the advantage of this method is that it naturally recreates the physical effects of light, such as indirect lighting, soft shadows, ambient occlusion, volumetrics, and more. 

‍Real-time - where every object in the scene is broken down into triangles that then generate pixels and are ultimately converted into data to generate the pixels shown on the screen. This method is used in video games and similar media, where what is shown on the screen must update immediately after an event, such as moving a character in a game world. With today’s technology, real-time can incorporate ray tracing to achieve a level of accuracy previously only seen in non-real-time rendering. However, some effects still need to be faked, whereas, in path tracing render engines, they come naturally.

Credit: Blizzard Studios. A shot from the Diablo 4 Rogue reveal trailer, rendered in Blizzard’s Real-Time Game Engine

Credit: Blizzard Studios. A shot from the Diablo 4 Trailer, rendered offline

The importance of optimizing renders

It's important to see projects to completion, learn from them and move on, but waiting hours on end to see what the project will look like will make it harder to do that. Keeping up motivation can also be extremely difficult over several iterations of the final stretch of a project, where we need to render at a quality close to our final render settings. We all have different interests, and no subject matter should be considered superior to others, but I think it would be fair to say that many artists lose sight of their initial goals and stay in their comfort zones mainly because of render times. Knowing some optimization techniques can mitigate that.

Today, offline render engines are much faster, and real-time rendering almost bypasses the problem entirely. However, optimizing scenes is still crucial to professionals and students alike. We won't go over in too much detail how to optimize scenes in this article, but here are some basic considerations that can save hours of waiting for renders to finish:

1. Practice telling more by showing less

A compelling image tells a story; to the benefit of all visual artists, the best stories are never overstated. When planning scenes, always ask yourself whether each element is necessary to what you want to communicate. This will allow you to focus on what people will really be looking at in your images and in some cases, even give you a better understanding of what your image is really about. 

(Hopefully) This render depicts a monarch and his vizier receiving a guest in perhaps not the highest spirits. Compositing a shadow in the foreground not only made the scene less render intensive than if an actual extra character was in its place but also made for a cleaner composition.

2. Work within the constraints of your computer's memory (HD/RAM/VRAM).

Every polygon, image texture, modifier, hdr map, simulation, and particle system (to name some of the factors) increases the memory consumed by your machine when executing a render. Determine what elements the viewer of your work will focus on, which ones fade into the distance or are partially obscured, and simplify them. 

This can mean decimating their geometry to produce low poly versions, using smaller (or less)  image textures, or reducing the amounts of instances generated by particle systems. You may find that your scenes render much faster without any real cost to the overall quality and detail in the image. This also affects, to an extent, how smoothly you can navigate around your project in your viewport, which is just as important when iterating on a project. 

On the left is a bust rendered with 4096x4096 textures, with a polycount of 8786 quads.

On the right is a version of that bust with roughly half the polycount and 1024 x 1024 textures. While there are some visible changes in quality, the bust on the right would more than suffice as a substitute for a shot where this asset was not the point of focus.

3. Manage your sample count

Most render engines have presets for the number of samples calculated when rendering your scene. The more samples, the cleaner the render. However,  with the modern denoising features available in most renderers, you may be rendering more samples than you need. Try incrementally decreasing your sample count after your first render until you find a value where there's no real loss to image quality and has significantly lowered the render times.

The same bust rendered at 128 samples

The same bust rendered at 256 samples

Denoising was applied in both cases. Halving the sample count hardly makes a difference to the quality of the image. Denoisers are great for early to mid-iterations of a project but should be used carefully for the final render since some optical effects can be lost. 

‍This video by Decoded perfectly illustrates the importance of allocating time and work to the elements in your scene according to their prominence in the final result (and more!).

4. Using renderfarms

Online render farms are essential for meeting deadlines and big animated projects. They render a project’s frames simultaneously over a host of powerful computers in a network, which usually means you can get hundreds of frames rendered in the time it takes for a single frame in your project to finish. 

While using render farms cost-effectively is a skill in itself, some cloud rendering services, including ours, come with a dedicated support team of specialists to help you every step of the way. If you or someone you know could use some extra rendering power, check out our online render farm! 

If you want a brief primer on the benefits of render farms, take a look at this article.

 With even a basic understanding of reducing render times, we can render tests more freely and spend more time evaluating the resulting image.

3D rendering as a creative endeavour

Strictly speaking, very few creative aspects of rendering in 3D decidedly belong to this stage of the production pipeline alone. When we iterate on a project, we use our renders to evaluate the work and find what to improve upon, and often it will have something to do with other parts of the pipeline- some tweaks to a model, adjustments to lighting, etc. But, we can argue that once we’re at the rendering stage, we shift our focus from developing individual elements in our images to how they come together to form the whole of the work. 

We might adjust our global Exposure, the amount of motion blur seen on a moving image, try working in different color spaces or negotiate optics effects that contribute to the realism of a scene (like caustics). 

We can also set render passes to isolate different Light contributions that we can adjust individually in compositing and allow us to make stylistic choices.  

Only by seeing the final render do we become aware of the subtler opportunities for improvement available to us, and so ultimately, the 3D rendering phase is where we get to art direct ourselves. Personally, I find going through a list of key considerations is a great start to uncovering said opportunities:

Immersion

Whether or not photorealism was the goal, if viewers can’t lose themselves in an image, the culprit is usually a discrepancy from what we perceive in the natural world. Make sure everything is scaled correctly, textures have the appropriate fidelity relative to their distance from the camera, and the objects in the scene are affected by their environment.

The  render above, for instance, uses objects that were not true to real-world scale, while the lights and cameras were. The textures don’t seem affected by the environment in any way (everything is too clean) As a result, the subjects look more like action figures than living things.

Context  

An arresting render is more than its subjects. A palpable tone, mood, or narrative makes even a simple product shot captivating. Our layout, color choices, and contrast heavily determine whether we see more than what is shown.

In this render, we see a portrait shot of a woman situated somewhere dim with a blank expression. 

With some camera adjustments, lighting changes, and a vignette, we see more of her weathered face and piercing eyes, which might at least convey a sense of mystery and melancholy.Unfortunately, the end result feels a little overdone, and a lot of the soft quality of the skin from the previous version was lost, which brings us to….

Restraint

Working on a project for prolonged periods can numb the senses and make it easy to overstate things. Our pride in how well we modeled a certain prop might affect how much attention we bring to it to the detriment of the whole scene. A brilliant 3D artist once told me if you feel like you hit the right number for a shader value, light intensity, or exposure setting, reduce it by 0.5. Those words will serve you well!

So what is 3D rendering? It is the processing of data into pixels, the process of instructing a machine to process that data such that a balance is achieved between efficiency and quality, and the subtle art of fine-tuning a project to completion through the iterative analysis of that data. The more often we dedicate time to these aforementioned processes, the faster we can progress toward doing the best work we can.

----

Originally published at https://garagefarm.net.

Cinema 4D tips and tricks - never stop learning

General / 14 December 2022

I used to think that someday if I exercised enough, I would reach some creative destination where everything would be clear, and I would have mastered the art somehow.

During my journey, I realized that being creative will always mean unfinished business because we keep evolving and growing, and our ideas grow with us. What we accomplished today is just tomorrow's new starting point. No matter how experienced you are with a tool, the more you work, the more you will find yourself experimenting. The more you push the boundaries of the tool, daring more and coming up with ideas you have yet to learn how you will ever be able to create. Still, you know that you most certainly will.

Working in Cinema 4D is no different. No matter how crazy or avant-garde the last project was, you reach the point where the idea you manage to complete sets a new starting point from the ideas of tomorrow. Being an experienced user, in this case, might help to a certain level. For sure, having a deep knowledge of the software helps to have a clearer idea of the path to follow, but sometimes things come to the point where you are tracing something completely new.

Considering that every idea is something new, if not entirely, in some parts at least, there is no fixed procedure to achieve a particular result. There are almost always multiple ways to reach the same destination. The difference between an advanced user and a beginner sits in choosing the more efficient path to achieve a specific result. Most experienced users rely on strategies to ideate in more structured ways to mentally prepare the roadmap through the 3D modeling of a project. These strategies are tricks designed to improve performance and optimize the creative process. Every artist has their favorite workflow and set of tricks up their sleeves based on the nature of a project. 

One of the best things about working with Cinema 4D is the fact that the tool is one of the most popular software for 3D design and digital creation. It has a broad community of active and responsive users who share Cinema 4D tips and tricks on achieving some results at all levels. There are good chances to bump into another artist who has already been through a similar process for a different project and can answer your questions.

Before we get into it, should you find yourself in need of a good Cinema 4D Renderfarm, GarageFarm.NET has not only seamless and up-to-date support for C4D, but also a dedicated team of 3D experts who are available 24/7 that you can talk to in real-time. 

Tip 1: Bevel hard surfaces

One of the best tips I discovered as a young artist was to bevel everything. It might sound very simple or even obvious, but when you create a scene, whatever the content is, every detail matters in creating a balanced and realistic composition. For hard-surface objects, having beveled edges, even with small radiuses, will significantly impact the final result. This practice comes from a far more critical habit of observing the world around you. 

An example of a cube with beveled edges on the left and a cube with sharp edges on the right

Tip 2: Observe, observe, observe

Observe everything everywhere. Notice how light interacts with objects and materials, how not a single edge in the real world is perfectly sharp. Notice how even polished materials have a surface texture. Pay attention to details as if you were seeing the world for the first time, and register as many pieces of information as possible. There's no better exercise to learn how to create than observing natural and manufactured creations everywhere.

Tip 3: Work parametrically

Many spectacular Cinema 4D tricks come from the software’s ability to work parametrically. Parametric workflows use modifiers to create modular effects that can be stacked in various ways to achieve more complicated designs and animations. This also means that we can always go back and edit and adjust our scene's settings and the deformers we are using. Working in a non-disruptive way gives us, on one side, the freedom to make the necessary changes while having a complete view of the scene we are creating. On the other hand, we sometimes keep files lightweight by minimizing our use of external assets like texture maps.

An example of parametric design created by manipulating the modifiers’ settings

Tip 4: Practice what you learn

When working on a project, it’s essential to do the necessary research and ask the community about a particular effect you aim to achieve. You can follow one of many tutorials on a specific result but remember to be an active learner. Watching tutorials of different C4D tips and tricks could give you the results you need in a pinch, but just following a series of steps to get the result you need at the moment does not help you learn something deeply. Hence, one of the best tips and tricks is to be an active learner and take whatever information you need and put it into repeated practice, incorporating it into projects or small exercises while thinking about other creative uses of that information. 

Tip 5: Use the Render Queue to manage your time and momentum

When it comes to rendering, one tip that I find incredibly useful, especially when things start to pile up, is to create a render queue. Compartmentalizing the process and dividing the tasks allows you to be more performing and focused without interrupting the creation of the following composition while rendering the previous one. You surf the wave of creativity and create your compositions, adjust lights and materials, check the previews, and then have the rendering all take place together, eventually during the night, as many of us do to optimize and manage our time more productively.

Render queue settings tab

Tip 6: Interact with the community

Last but certainly not least, interact with the fantastic community of users that is out there. Share what you've learned and ask for feedback. Eventually, you might find even more optimized ways to achieve a result, or you could end up helping someone else. 

Make sure you never stop learning! Ideas come and evolve, and even the same idea remade after some time will turn out differently because our creativity grew and evolved. We might find better ways to achieve the same results, and those inputs can be new starting points. Curiosity and creativity go hand to hand in a neverending process of development and growth. Experiment as much as you can and even try redoing projects to see how your taste and skills grew in time, or take interesting details or concepts and expand them and incorporate them into new projects. Progress is an infinite spiral, and creativity is nurtured by many inputs that we can find everywhere around us all the time. Keep feeding your creativity, and keep having fun!!!

‍---

Originally published at https://garagefarm.net.

The best render engines for 3ds Max

General / 13 December 2022

Autodesk’s 3ds Max is one of the most popular 3D packages around. From feature film productions to game projects and architectural visualizations, thousands of artists use Max as their primary tool for computer graphics. Part of why 3ds Max is so popular is its long history and support across the industry. Over the years, studios large and small have built pipelines around 3ds Max that integrate and expand its feature set. Because of this, 3ds Max is known for being a highly flexible tool compared to the industry behemoth Autodesk Maya, as more tools and render engines often support Max before less industry-standard options. The result is a relationship where artists and developers have continued to push the industry forward using 3ds Max, despite the software being over twenty-six years old.

In this article, we’ll be going over the top four 3ds Max renders. These render engines are widely used and have feature sets that can compete with the best computer graphics available while remaining accessible for everything from freelance projects to multi-million-dollar studio productions. For those choosing to render 3ds Max projects, these are the must-know engines for creating high-quality, production-ready images.

If you’re looking to test out any of these engines before fully investing in one, check out our 3ds Max rendering services here at GarageFarm. With support for V-Ray, Redshift, and Corona renderer, and a free trial period with $50 of free render credit, it’s a great way to test the waters with your render engine(s) of choice.

V-Ray

To say V-Ray is a popular render engine is an understatement. V-Ray was one of the first major path-tracing render engines to market and has pioneered technologies in photoreal rendering for decades. V-Ray has supported 3ds Max since the beginning and has consistently added new features since its introduction in 1997. Like 3ds Max, V-Ray’s advantage is its long history and industry support. Being a long-time industry player has given the 3ds Max renderer time to develop a robust, optimized path-tracing engine.

Credit: V-Ray / Chaos

Arguably, V-Ray’s strongest advantage is its comprehensive feature set. V-Ray supports must-have features like GPU and cloud rendering, global illumination, and one of the most advanced material engines on the market while also supporting next-generation technologies like in-engine denoising, procedural lighting/hair/and shaders, and scatter/proxy tools to speed up rendering.

However, with V-Ray Premium costly, almost 700 USD per year, the price tag can be hard to justify for small studios or freelancers who may not need to use the full feature set the renderer offers. And with new renderers coming to market that can match the speed and features of V-Ray, the renderer is less attractive than it once was.

Redshift

Initially released in 2014, Redshift is the new one in the 3D rendering scene. Redshift Rendering Technologies developed Redshift before being acquired by Maxon (the company behind Cinema 4D) in 2019. Redshift made waves in the industry by claiming to be the world’s first fully GPU-accelerated render engine. While this makes good headlines, what truly sets Redshift apart is that it is a biased renderer. This means the render engine uses several “cheats” to speed up rendering and change the look and feel of rendering.

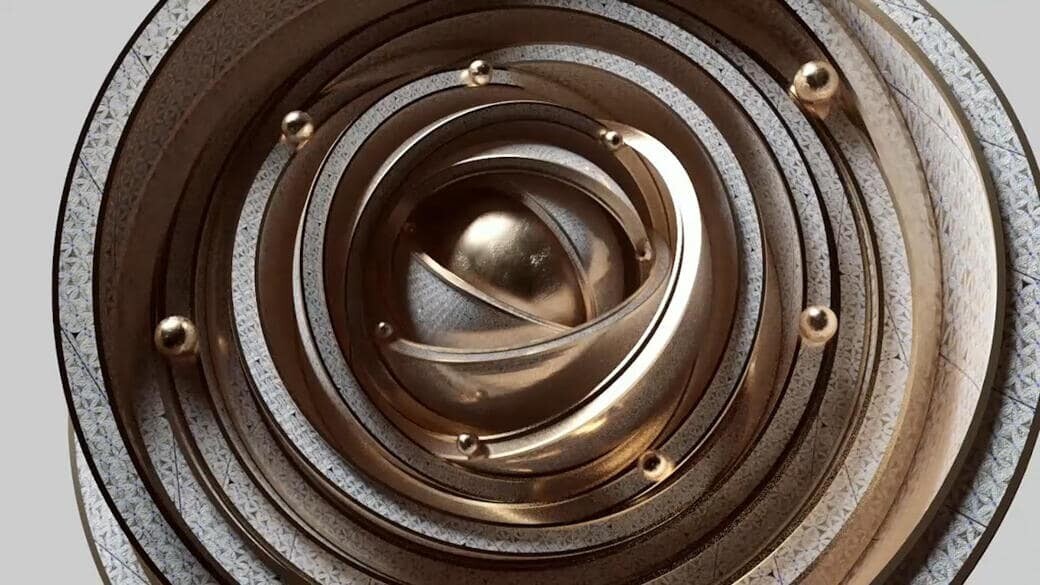
Credit: Bettina Vöröss / Maxon Redshift

Redshift has quickly become one of the most popular 3ds Max renderers for its responsive rendering and incredibly sophisticated physically-based shading system. Redshift’s speed makes it handy in look development by allowing artists to preview their shading and lighting without sending off lengthy renders. Redshift’s PBR shading system uses node-based materials that allow artists to build complex materials on the fly. For some, this is an excellent advantage to Redshift; however, it can be a disadvantage for those unaccustomed to node-based systems.

Another potential disadvantage of Redshift is that it can be less straightforward to obtain maximum realism with Redshift compared to unbiased renderers like Arnold. This is the inherent tradeoff between biased and unbiased rendering. While realistic scenes can be made with Redshift, it can take more time and energy. Instead, Redshift’s strength is its speed and flexibility, making it a good choice for commercials, product rendering, and motion graphics.

Credit: Hirokazu Yokohara / Maxon Redshift

Arnold

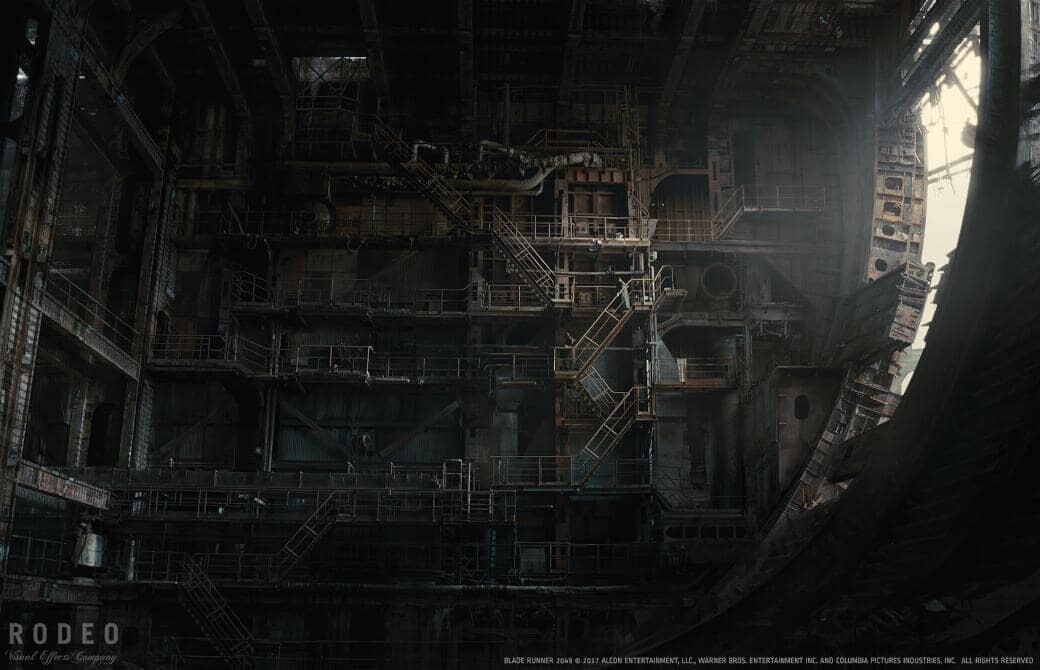
Developed by Solid Angle and Sony in the late 1990s, Arnold renderer is known for being the top render engine for visual effects and film production, with productions like the Mandalorian, Avengers, and Blade Runner 2049 using the render engine. Also being developed by Autodesk, Arnold is a natural choice for 3ds Max users and has close integration with the software. Like V-Ray, Arnold is a path-traced Monte-Carlo renderer, which can generate highly realistic scenes with minimal tweaking on the artist’s end. The realism of Arnold’s rendering algorithms is one of the top reasons studios have adopted Arnold.

Arnold’s ease of use is one of its surprising strengths considering its wide use in high-end productions. However, Arnold’s niche target of high-end film and TV production leaves some disadvantages. For one, the engine’s lack of optimization settings and biased rendering tools make it more cumbersome to get right versus engines like Redshift or Corona for archviz or product rendering.

Credit: Rodeo FX / Autodesk Arnold

Additionally, Arnold is known for being somewhat slower than its alternatives because of its unbiased algorithm. This might not be an issue for high-end studios, but for freelancers and small studios thinking about render costs, render speed can make a big difference. So unless your projects require top-notch realism, Arnold may be overkill.

Corona

Developed by Chaos, the same team behind V-Ray, Corona offers a lightweight approach to rendering in contrast to the heavy-handed approach of render engines like V-Ray or Arnold. Corona is advertised as a 3ds Max renderer for architectural visualization and truly shows its strengths in this niche. Corona’s target user is archviz artists and this is clear when looking at the renderer’s feature set. 

Being in a niche market, Corona is cheaper than most of its competitors, making it a good choice for those looking to try a new renderer. Combined with its fast render speeds, Corona is a good choice for artists looking to upgrade their renders without investing huge amounts of time or money. 

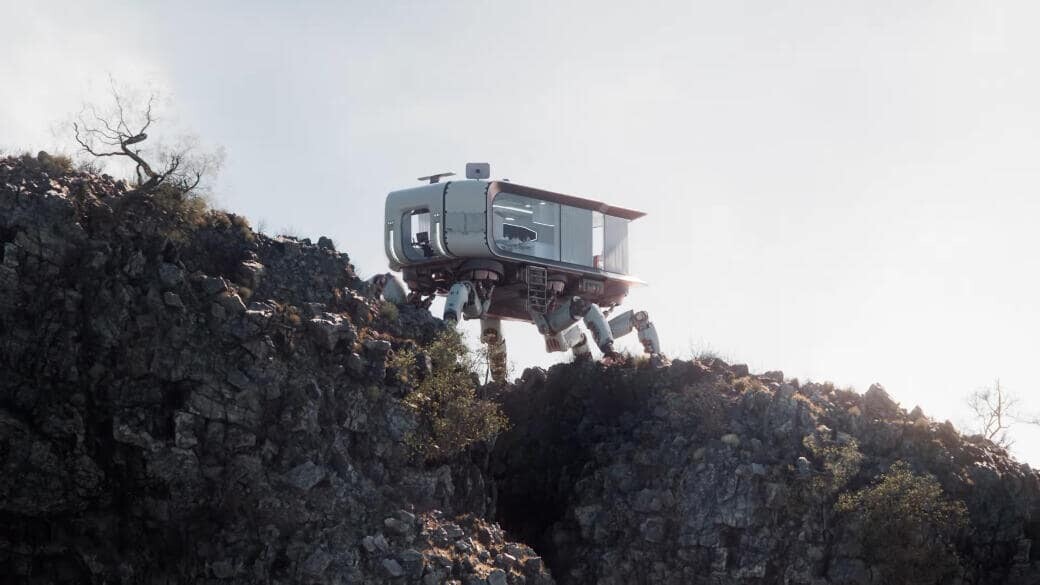
Credit: ebmeraCGI / Corona

Because of its niche target for archviz renderings, Corona’s main downside is its lack of flexibility. Corona lacks the wide feature set of its competitors. So if you are accustomed to V-Ray, stepping down to Corona could be a difficult translation. However, the simplicity of Corona has its advantages. For one, it’s much easier to use out-of-the-box and takes much less time to tweak.

Another disadvantage is that the render engine only supports CPU rendering and lacks any support for GPU rendering. So if you’ve heavily invested in a GPU for rendering, Corona may not be a good choice.

Conclusion

When choosing a 3ds Max renderer, there are plenty of things to consider. Speed is often proposed as a top consideration, but can largely depend on particular scenes and types of projects, as is clear from the many industry benchmarks that have been done. Feature flexibility is another big concern for power users who are accustomed to maximizing their scenes through extensive use of advanced features like volumetrics, proxy rendering, and procedural tools.

Another thing to consider is what render engines support the engine of your choice. For example, even if a render engine like V-Ray may be slower than an engine like Redshift, good render engine support can bridge the gap if other advantages sway your decision toward an engine like V-Ray.

In the computer graphics community,  it’s easy to get sucked into the politics of which is the “best” render engine. But in the end, what engine you choose to render 3ds Max projects in depends on your specific needs as an artist. The best engine is the one that provides what you need to make your client happy, be it speed, flexibility, realism, cost, or integration into your project pipeline. After all, a rendered image is only as good as the artist behind it!

---

Originally published at https://garagefarm.net.

Maya For The Indie Artist, is Maya for you?

General / 12 December 2022

To Maya or not to Maya

If you’ve had your jaw dropped by Spiderman: Into The Spider Verse, or wowed by the intergalactic battles in Avengers, or blown away when you first loaded into the world of Uncharted 4: Thief’s End and wondered, “How the heck did they create those visuals?”, the answer is Autodesk Maya.

A behind the CGI look at Marvel’s The Avengers from 3D studio Industrial Light & Magic

Maya is a fully featured 3D software, but it is most known for animation. Well, not just “known”; Maya is considered the industry standard animation software. In fact, Animation Mentor, the original online animation school, teaches 3D animation in Maya. VentureBeat Magazine also stated that every winner of the Academy Award for Technical Achievement since 1997 used Maya. 

Simply put, Maya is synonymous with world-class 3D animation. (If you’re already familiar with Maya and want to read about recent developments, read our article about Maya updates.) 

If you are now hyped to learn how to craft scenes of giant robot fistfights or bring the Jurassic era back to life or fold whole cities onto themselves, let’s answer some basic questions to determine whether you and Maya are a fit.

What can Maya do?

In Maya, you can do pretty much everything in the 3D pipeline. You can do polygonal or NURBS modeling. You can map a texture onto materials. You can automate the animation of fire, liquids, smoke or cloth using built-in simulations. And you can give your scenes a photorealistic finish using the powerful Arnold render engine.

(Already got a project in Maya that you need to render? Give our Maya render farm a look.)

Arnold Renderer in Maya. Image from NVIDIA.

You can do all these and more in Maya but as mentioned above, animation is where Maya lives and breathes. Its animation tools are among the most powerful and most mature in the industry, being over 20 years old. And in all that time, its engineers have crafted plugins and fine-tuned the software to overcome any and all challenges when it comes to animation.

We can’t possibly list here all the things that make Maya superior for animation but let’s name one key feature: its sensible and seamless UI that leads to an efficient workflow.

When working on something so complex and laborious such as animating 3D objects, the little things matter a lot. Things like being able to import a character rig in just 3 clicks (compared to at least 7 in Blender). Or having keyboard shortcuts for often-used commands that are laid out sensibly with regards to hand positioning, for instance, letting you add a new keyframe without taking your eyes off the screen to look for the right button because the shortcut is already there where your hand normally is. Or having the ability to grab a curve, to isolate a curve with one click so as to not mess up with other curves, select and deselect curves with a click, slide curves up and down without the need to be too precise with your mouse movement in Graph Editor – stuff like these let you save energy and time to focus on the actual animation and minimize mistakes. 

Is Maya hard to learn?

The short answer is yes.

The longer answer is anything 3D is hard to learn, especially if you have no prior experience. So if you are an absolute beginner, you will have to bring your expectations down much, much lower. You can’t come into Maya and expect to come out with exploding stars and marauding aliens in a few weeks. 

It’s a long journey before you’re making film-worthy graphics with Maya. Take time to learn the basics, like Maya’s UI.

Honestly, you most likely won’t be anywhere near making Avengers-level visuals even in a few years. Just the sheer number of tools and commands and features and settings can overwhelm you. No 3D software is designed to be like a mobile app that you can simply intuit your way around from the get-go. When starting in Maya, you would have to take baby steps and settle for creating simple objects and movements, get to know the tools, develop muscle memory for the controls, and generally wrap your head around the fundamental concepts first. Learning and mastering 3D is a long journey, to say the least. You must be someone who enjoys the process of learning and someone who takes joy in making incremental progress.

But if you are patient and not someone who easily quits, then Maya will reward your hard work. You already know what Maya is capable of since you see its output pretty much everywhere – in films, games, ads, and shows. So whether you’re in 3D school or are studying by yourself through online tutorials, learning Maya can be a joyful, personally rewarding, and financially lucrative (more on this later) undertaking.

Is Maya free?

No. Maya is heavy both on your wallet and your hardware. You’ll need lots of cash and a powerful computer to run Maya. Maya costs $1,785 annually or $225 monthly for the subscription. You cannot purchase Maya outright. 

However, Autodesk has launched Maya Creative. It’s a cut-down version of Maya that has its modeling and animation capabilities but doesn’t have the simulations and the ability to load third-party plugins. Maya Creative is aimed at indie 3D outfits that do not have the budgets of the big studios. Maya Creative can be accessed through Autodesk Flex, a token-based, pay-as-you-go platform that charges you only for those times that you use the software. All told Maya Creative costs about $3 a day.

Is Maya worth learning?

With practice and patience, you can do anything in Maya. Credit: Fablefx.com

As in anything connected to 3D, it always boils down to your objective as an artist. If your goal is to become a 3D professional specializing in animation, then learning Maya will make you as hireable as you can be. Do a quick LinkedIn job search for “3D animator” and you’ll find that most of them are looking for someone “proficient in Maya.” Needless to say, if you want a shot at being hired by the biggest VFX or gaming or animation companies in the world, your best bet is to get good at Maya.

If you are more of an independent creator, or someone who just wants to get one’s feet wet with creating 3D visuals, then you don’t necessarily have to put down some money for Maya. Something like Blender, being free and fully-featured as well, may be a better fit for you. 

So: to Maya or not to Maya? If you want to specialize in 3D animation, you already know the answer.

---

Originally published at https://garagefarm.net.

What is Cinema 4D used for?

General / 30 November 2022

Cinema 4D has become popular in the 3D and animation industry thanks to its complete set of tools that go from 3D modeling, to sculpting, rigging, animation, simulations and rendering. What makes it one of the most used software solutions in many creative fields it’s how fast, performing, flexible and powerful its tools are, allowing users to create incredible, complex and realistic effects both on still images and animations.

From 3D visualizations and rendering for AD campaigns to broadcast motion graphics, VFX, augmented, mixed and virtual reality, product visualization and TV and movie productions, Cinema 4D can cover them all.

Before we look closer at all these fields, check out our Cinema 4D render farm. New signups get $50 worth of starting credit, and our support team is available 24/7 and would be happy to help you and answer any questions you might have. 

Broadcast motion graphics

Broadcast motion graphics is probably the most popular segment of the creative industry that benefits from the potential of Cinema 4D's toolkit. From advertising to commercials,  product presentations, social media content and much more, Cinema 4D offers the right tools to achieve it. Especially when it comes to loop motions or patterns or random effects C4D deformers, and modifiers such as cloners and effectors are the answers to your creative needs. 

Another reason why Cinema 4D is very popular in this industry is that the mograph tools are incredibly user-friendly and allow designers to create stunning results in a quick and performing way, sometimes including many repeated shapes that are all created using a few combined elements and managed by their settings. This incredible usability leads to the creation of a wide user community that is very active and responsive and contributes to producing a lot of materials in terms of tutorials, solved issues, shortcuts, tricks etc to create and develop your ideas.

For example, the motion graphics ad that Frame created for B&B Italia to capture the beauty and elegance of the Up Chair was created by introducing some playfulness into the concept inspired by the icon shapes of the chair where the high quality of the materials comes to life in a semi-abstract animation of how the chair could have potentially come to life in an abstract world. 

Frame x B&B Italia, Up Chair

Frame x B&B Italia, Up Chair

Advertising industry

Another field where Cinema 4D performs incredibly well, thanks to the variety of tools it provides, is advertising. Combining the different tools and elements and even forces and thanks to the help of some plugins, C4D allows users to create stunning creative concepts expressing and communicating messages that otherwise would be almost impossible to create and keeping an incredible level of realism.

Abra.Network x Yope, 3D advertising 

Using forces or growth plugins to generate real or totally abstract natural elements it's been used to spice up creatives advertising concepts while better expressing the brand DNA of the client. For example, the ad campaign that Abra.Network developed for Natural Beauty products from Yope was designed to merge different elements while bringing to life the wild ingredients that characterize each product. The results are a series of layouts that are bold and wild and stand out from the crowd of other beauty campaigns.

Abra.Network x Yope, 3D advertising

AR/MR/VR

Augmented, mixed and virtual reality have become a huge trend to create more engagement between products and final customers. From games to digital try-on concepts, the possibilities for this technology are endless and for sure, they are opening up a new world of creative concepts that speak to final customers in a completely different and more immersive way.

The powerful tools that C4D offers allow us to create, animate and prepare files for augmented or virtual Reality and integrate the files with the final tools developed by other partners like Adobe for the final stages of the development. You can create an entire scene or a character, animate it and incorporate it into an AR scene sending the files directly to the specific tool you are using.

The creative agency Broduction, for example, created a movie to promote the AR game Pokemon go, where they included the digitally animated characters in the production footage while searching for Pokemons around the city through the screen of their mobiles.

Cinema 4D, in this case, helped both to create the characters and manage the settings in order to fit the specifics of the AR tools and also as a base to include the creatures inside the production itself, respecting the correct proportions and spacial elements as if they were also part of the real world.

PokemonGo, Agency: Broduction

Is Cinema 4D good for VFX?

As briefly mentioned in the previous example, Cinema 4D is also equipped to help creators integrate digital 3D designs into real-world footage. The motion tracker tool is probably the most interesting tool for special effects and allows to integrate seamlessly 3D into existing footage and with the help of the scene reconstruction, it's possible to recreate an entire scene and replace real objects with 3D objects created in cinema 4D while the camera calibrator helps to match perspective and camera angle in order to get the best results for short movies or bigger productions.

Even if the developers focused mostly on motion graphics, visualizations and design studios, Cinema 4D is being used to create special effects in big-budget movie productions taking advantage of its amazing mograph tools to create sci-fi and futuristic effects.

A lot of smaller productions as well took advantage over the years of the potentialities of C4D combined with the incredible user-friendly architecture of the software.

For example in Blade Runner 2049, directors used Cinema 4D to create graphics for futuristic monitors, interiors of a library and a penthouse and also fluids simulations for special effects or to display the outer world, capturing it in a very unique way, but also other effects like ghosting and glitching effects and color grading alongside with textures. According to the result that needs to be achieved, Cinema 4D is flexible and powerful enough to adapt to different requirements and respond in a professional and performing way.

Scenes from Blade Runner 2049 (VFX by Rodeo FX)

The fact that Cinema 4D is so easy to approach and offers powerful and efficient tools in different areas, from motion tracking, to rigid body to create natural forces interactions, soft bodies to simulate all kinds of deformations and collisions managing settings like stiffness, damping, flection and so on describing in detail how the material is going to behave and interact with other forces into the scene, cloth simulation to create realistic fabric effects and more complex ones like particles simulations, forces and emitters makes it incredibly versatile to different uses and creative purposes and even if it's more designed for some uses rather than others it still can compete with other more specific software pieces.

A large number of users professional and not gave a huge contribution to the development of tools and tricks to achieve almost everything you can imagine, either counting on the embedded tools or expanding them through the wide range of plugins options that the market offers,  placing C4D among the best software you can find on the market and where you can experiment and combine different “recipes” to achieve everything you can imagine!

---

Originally published at https://garagefarm.net.

Cinema 4D Alternatives

General / 28 November 2022


C4D, but make it not Cinema 4D

Many consider Cinema 4D as “the” 3D software. And while it can do anything and everything 3D with it — integrating visual effects into live-action shots, modeling characters, bringing to life architectural designs, designing game environments, and so on and so forth — Cinema 4D is best known for motion graphics. In fact, when you say you are a 3D mograph artist, many would simply assume that you use Cinema 4D. 

Screen capture of software UI

Many also find Cinema 4D’s user interface to be among the most user- and beginner-friendly. For many artists from different disciplines, Cinema 4D’s sleek and clean layout of tools and menu is perhaps the most intuitive out there. For example, someone who is an avid Photoshop user and uses Cinema 4D for the first time may find that many aspects of each software’s interface correlate well with the other.

And while there is other software that lets you achieve similar things as with Cinema 4D, perhaps none lets you achieve it in less time.

So if Cinema 4D sounds like a dream, why bother looking for an alternative?

Well, a few reasons. For one, it sets you back for a subscription of about US$718 a year. So if that’s an amount you’re not willing to part with for access to 3D software, then you should know that there’s a fully-featured 3D software out there that’s FREE. More on this later.

Another could be that you already have 3D software and didn’t realize that it can do many things that Cinema 4D can. And if it is the software you already paid for, it may not make sense to spring for another.

Whatever your reason may be, here’s our rundown of similar software that just might include the right Cinema 4D alternative for you.

Blender

Source: Blender Foundation

‍Price point. Blender is free and open-source. Not freemium; it’s absolutely free. No in-app purchases, no trial periods, no student licenses, and no limits whatsoever. This unbeatable price point makes Blender perfect for a range of users, starting from beginners who are taking their first steps in 3D all the way to freelance professionals and even small studios who don’t necessarily have the budget yet for paid subscriptions.

‍Ease of use. Here lies the rub: many find Blender’s interface to be, at times, cluttered, other times confusing. While Blender has implemented many updates to improve its interface, many still find it hard to get a handle on compared to Cinema 4D. Blender is a complex and powerful software, so it’s understandable that it’s not necessarily as easy to use and easy to learn as, say, a photo-editing app on your phone. 

The way to proceed with Blender as a beginner is to take it slow and lower your expectations in terms of what you can make with it, at least at the start. Don’t think yet of cameras, textures, rendering, UV mapping, shaders, and all that stuff. Be patient and take time to master the basics of the software first: keyboard shortcuts for selecting, moving, adding, and deleting, then move on to understanding Parenting and Collections, then on to Modifier Stacks, and so on and so forth. It may take longer than if you’re using Cinema 4D but remember that Blender is free and that it’s fully-featured — it’s perhaps as powerful as Cinema 4D; you just need a bit more time to unlock that power.

If you want to know more about Blender vis-a-vis Cinema 4D, read our in-depth comparison article about Cinema 4D vs Blender.

‍Motion graphics. Right out of the gate, Blender has all the tools to produce world-class motion graphics (provided you put the hours in to learn the software and build your skills). But if you are looking for more tools to improve your motion graphics further, Blender offers a universe of add-ons that can help you. Specifically for motion graphics, many users find Animation Nodes and Sverchok to be must-have add-ons for automating fantastic and complex, and amazing movements.

‍Community and support. Blender has a huge global community of avid users; you will never lack tutorials. It’s open-source, so many people outside the software’s core back-end team are also working to improve the software through custom tools called add-ons. There is also a universe of chat rooms and forums and message boards that you can jump onto and consult other Blender users to get specific answers for specific barriers that you encounter.  You can try out ultra-fast Blender rendering with free credits on us by visiting our blender render farm!

Houdini

Price point. Houdini is…expensive. The full version, Houdini FX, sets you back US$4,495 for the perpetual license (you then pay US$2,495 for the Annual Upgrade Plan in the subsequent years to keep your software up-to-date). However, there is Houdini Apprentice, a free version for students and hobbyists that has “virtually all” of Houdini FX’s features. The only catch is it renders out all output with a watermark. They also offer an Indie License for US$269 a year. 3D companies or artists with annual gross revenue of US$100,00 or less can purchase Houdini Indie.

‍Ease of use. Houdini is very different from Cinema 4D where many of the tools you need are built in. At Houdini’s core is a procedural way of approaching visual development and so it is decidedly more complex, even mathematical. In Houdini, you don’t just use tools to create the visuals that you want; you create tools that create for you the visuals that you want. As such, Houdini has a famously steep learning curve.

‍Motion graphics. So if Houdini is expensive and hard to learn, why should you even consider it as a Cinema 4D alternative? Well, many consider Houdini as the software for higher-end, more complex, perhaps even next-level motion graphics. Clearly, Houdini isn’t for absolute beginners, but those who persevere in it are rewarded in the end. 

There aren’t yet as many Houdini artists as there are C4D ones, so being someone who can wield the seemingly arcane powers of Houdini can make you a sought-after artist in the industry. Also, while design and look ultimately depend on the artist and not on the software, the fact that millions of artists have been using Cinema 4D can lead to a sort of sameness. Houdini offers a way to break free from “traditional” Cinema 4D tools which can lead to fresh and unique visuals and looks. 

Take a look at this music video for Major Lazer created by Method Studios using Houdini. If you think of modeling and animating every single piece of ball, feather, fur and string for every frame in this video, you probably wouldn’t still be done by now. Houdini’s procedural tools allow for the creation and manipulation of huge numbers of assets with relative ease and speed: 


‍Community and support. While there isn't yet an army of mograph artists that are both on Houdini and on chat groups, there are already quality tutorials and resources out there for Houdini. 

3ds Max

3ds Max 2020 Splash screen. Credit: Autodesk

Price point. 3ds Max has a free trial period of 30 days. The trial lets you explore all the features of 3ds Max but at the end of the trial period, you’ll have to choose one of 3 subscription modes: US$225 monthly, US$1,785 yearly, or US$5,085 for 3 years. 3ds Max does not offer a perpetual license.

‍Ease of use. 3ds Max is a Cinema 4D alternative that has perhaps the flattest learning curve among the programs mentioned in this article. Its interface may also be the most Cinema 4D-ish. One artist who worked with 3ds Max for 7 years before shifting to C4D said that C4D felt like 90% of what he was used to with 3ds Max (however, the same user also said that 3ds Max has hundreds of buttons that are perhaps a decade old that Cinema 4D never removed and that the user has never pressed; so, YMMV). 

Many find that operations and processes work faster in 3ds Max than, say, Blender and this leads to a smoother workflow, especially as scenes start to become more and more complex.

‍Motion graphics. While 3ds Max is more popular among the archviz crowd, it’s quite capable when it comes to motion graphics. So maybe you’re an archviz artist who wants to dabble with motion graphics? No need to spring for new software just yet — 3ds Max’s got you. 

You can model objects (logos, products, and what-nots), build out scenes, texture and light away in 3ds Max just fine. Now when it’s time to animate, Cinema 4D has tools to make things move the way you want easily and quickly. In many cases, you can achieve similar effects in 3ds Max but it might take more steps and, therefore, more time. This all, of course, depends on the level of finish and how much time your project needs to be turned around in. But mind you, many graphics departments of TV stations, particularly those broadcasting sports, have got by using 3ds Max for decades.

‍Community and support. A quick lookup shows that Reddit’s community for 3ds Max has 31K members. This is a similar number to Houdini’s 33.2K members as of writing. There are also scores upon scores of tutorial videos on Youtube, Vimeo, and the Autodesk Knowledge Network, which are more than enough for beginners in motion graphics to find their footing with 3ds Max is well supported.  You can also try it out using free credits on our 3ds max render farm.

Final words

So, these are some alternatives to Cinema 4D you can turn to. I guess this is the best time now to drop the mother of all caveats that often applies every time one is comparing software — what is confusing and messy for one may be intuitive and streamlined for another. It’s always a bit tricky to compare software because it’s never apples to apples. 

So, it’s best to take comparison articles, including this one, with a grain of salt. At the end (and it’s time for another 3D industry platitude), it’s never truly about the tool; it’s about the artist. Pick one, dive deep, and get good. 

To help you with getting good, you can learn more about Cinema 4D, Blender, and 3ds Max over at our blog.

---

Originally published at https://garagefarm.net.

3ds Max modeling and beyond - is it worth it?

General / 24 November 2022

Why use 3ds Max? Why master 3ds Max instead of learning Blender or Cinema 4D? What are the advantages and disadvantages of modeling your scenes in 3ds Max?

The honest answer

The truth is that for basic modeling, as I write this in 2022, there is not a great deal of difference between 3ds Max, Blender and Cinema 4D. I am familiar with all three, and the key advantages for me are that 3ds Max is the most commonly used in the arch viz industry, and has many powerful plugins and tools that can be added into it. Alone, without plugins, 3ds Max is more limited than Blender or Cinema 4D, but with a few plugins it becomes by far the most powerful for creating photo-realistic scenes of all kinds.

A more important question you may want to ask yourself is not necessarily what is best but what software is most commonly used for the work you want to do. The first 3D software I learned was not 3ds Max, it was Cinema 4D.  When I applied for jobs in the architecture world, particularly in architectural visualization, I soon found that every job I applied for required knowledge of 3ds Max, not Cinema 4D. So I decided to teach myself 3ds Max and within a month I’d landed my first job. The good news is that once you know one 3D software, transitioning to another 3D software is not so bad - it’s going to be a painful few weeks but it’s far easier than learning any 3D software for the first time.

This brings me to an important point: no matter which software is best for any given purpose, always keep your ear to the ground about which software, tools and languages are being used in the industry where you are building your career. If you notice a trend, for example, that 3ds Max is being used by fewer companies in your industry of choice, and more and more companies are using Blender (perhaps simply because it is free…) maybe it’s a good idea to learn Blender. If most firms use 3ds Max, you’ll want to master 3ds Max. 

Don’t worry: these industry transitions take many years because it is expensive and difficult for any company to switch software. In my experience, it was difficult for the firms where I worked to UPGRADE their 3D software, let alone change it; there would always be looming deadlines and reasons that certain teams couldn’t afford to risk any delays, and because it’s important for everyone in a firm always to be working in the same software and the same version of that software, there was reluctance to upgrade different workstations at different times.

As you can see, a simple upgrade often requires a fair degree of orchestration and planning, so it’s unlikely that any firms will make a complete switch of software overnight. The question to keep in mind might be: what are the newest companies in the industry using? It is to this that I pay attention.

On 3ds Max modeling (and beyond)

3ds Max modeling features are very capable, but as stated earlier, Max requires additional plugins to reach its full potential. The tools to get to know, in my opinion, are Mudbox or ZBrush for sculpting, Forest Pack and Railclone for scattering, and Tyflow for physics and effects. For sculpting, I personally use ZBrush but Mudbox probably has the advantage over ZBrush in terms of compatibility with 3ds Max, as they are both owned and operated by AutoDesk. But both can be used to sculpt just about anything, so remember what we talked about! Keep an eye on the job openings in your industry and see how many require ZBrush knowledge vs Mudbox knowledge. Is it the same ratio as last month, and the month before? What about last year? 

Keeping on top of industry trends can be exciting for some, and exhausting for others, but the truth is that the ability to adapt has become a crucial survival skill in the fast-changing world we live in. For most of human history, technological change came slowly: in your youth, you’d learn a craft from the elders in your family and spend your life mastering it. The chances of those skills becoming outdated were almost nil. Today, the world is advancing so rapidly that keeping your eyes open to industry shifts might be crucial to your success.

Lastly, if you like special effects and you choose to move forward with 3ds Max, familiarize yourself with TyFlow. It is jaw-droppingly versatile, powerful and fast. No other software can compete. It does require a hefty, or newer, graphics card to utilize its full cloth calculations, but you’ve always wanted a legitimate reason to go big on your GPU, right? It is also a newer plugin and most companies won’t have even heard of it and render farms may not yet support it.  But I expect that they eventually will, especially if it becomes officially integrated into 3ds Max, which is a likely possibility.

 If you are unfamiliar with TyFlow, I’d recommend taking a minute to do a YouTube search of people having fun with TyFlow and 3ds Max. As someone who spent days creating physics scenes with dynamic objects in 3ds Max over the years, I was blown away by how easily and quickly I could create even better scenes using the free TyFlow plugin!

While 3ds Max modeling features are the most robust, as a whole, Max is more limited than other tools. However, with a few plugins, it becomes the most powerful for creating photo-realistic scenes.

Another crucial plugin for me has been Forest Pack, by iToo software. Unfortunately, like Mudbox, it is not free. Technically, Forest Pack is simply scattering software. It helps you scatter objects around your scene. But it is powerful and if your scenes contain grass or forests or leaves scattered randomly around the ground… Forest Pack is a must-have. Your grass and forests will be photo-realistic with very little effort. It also comes with a substantial library. There have been countless times where I was about to purchase a 3D model of a particular plant or a laurel hedge, for example, until I remembered to check the Forest Pack library and- voila- I already had it in the Forest Pack library. The library was less than 100 plants when I first began using Forest Pack, it is now well over 400. 

You’ll probably want V-Ray for lighting, materials, and rendering, but whichever render engine you choose, consider which ones are supported by reliable online render farms. The more complex your projects become, the more likely you’ll need to send them off to a render farm to be able to meet your deadlines. Our 3ds Max render farm supports most if not all of 3ds Max’s widely used plugins and render engines and has glowing reviews from professionals using 3ds Max in all sorts of industries. 

Parting thoughts

In summary, 3ds Max is my favorite for basic modeling but on its own it is unquestionably more limited than its competitors when it comes to more advanced elements such as sculpting, physics, particle dynamics, and scattering. It’s also expensive. However, that being said, once 3ds Max has been beefed up with the handful of plugins I mentioned, it is by far the best out there for many purposes. 3ds Max is also a great starting point for basic modeling. I have recently begun doing more work with Unreal Engine and Twin Motion, and building things for 3D printing, but the modeling always begins in 3ds Max.

---

Originally published at https://garagefarm.net.