Winning with Modo

General / 04 May 2023

For its recently concluded 3D contest, Modo gave this prompt to 3D designers in Japan: use Modo to create a realistic render of food. Guess who won? An architectural visualizer took the top prize while a designer of pachinko machines took second and a modeler of backgrounds for games were the runners-up.

If you’re wondering how people who work with 3D models of mostly inorganic things for a living (office buildings, arcade machines, and gaming backdrops) can be so good at rendering something as organic as food, read on and learn about some of the lessons and realizations the winners took from the competition.  

Lesson #1: Stick to what you know

First place winner Tomoyuki Kato decided to make a gingerbread house because it was particularly close to his heart. “I decided to create a cookie house as a nod to my childhood memories,” said Tomoyuki. 

As a result, his 3D render has an outstandingly unique atmosphere to it. Tomoyuki’s output has a vibe to it that can only be achieved by recalling fond memories that are deeply personal. Even without seeing any people in the image, you get this feeling that perhaps a big family is gathered, laughing, connecting, each one feeling at home with the others – exactly the effect Tomoyuki was after. “In order to make the design more appealing, I emphasized the importance of "storytelling," imagining that the house was handmade by a family,” he said. 

As the kids like to say today, Tomoyuki’s Gingerbread House is a mood. 

House by Tomoyuki Kato. First place.

(Got a personal project you need to render? Check out our cost calculator.)

While the overall appeal of Tomoyuki’s image is definitely more than just the sum of its parts, the charm perhaps comes from the touches of intentional imperfections that the artist so skillfully employed. “I aimed for something with a hand-made feel. I was conscious of eliminating any unnatural straight lines, and I attempted to remove the CGI look by distorting the cookies, creating wrinkles on the tablecloth, and tilting and crushing the cups.” said Tomoyuki. 

He was so intent on dispelling all CG-ness from his output that he ended up doing something so analog and so manual for something as digital as a 3D render. “For the cookies on the roof, I didn't use a replicator or anything like that, so I chose each one and placed them on the roof as if they were actually made,” said Tomoyuki. For a moment there Tomoyuki sounded more like an artisan baker, less like a 3D artist. “It was fun to feel like I was actually making a cookie house,” he added.

Lesson #2: Don’t stick to what you know

While sticking to what he knew and what was close to his heart worked well for the overall feel of the image, stepping out of his comfort zone helped Tomoyuki achieve the effect that he wanted for certain specific details. Powdered sugar, it turns out, was a particularly tricky material to get right in 3D. “The only difficulty I encountered this time was with the powdered sugar. It took a lot of time to figure out how to create it. I applied the method of procedural textures and used nearly 10 types of powdered sugar,” explained Tomoyuki.

The thing is, Tomoyuki isn’t overly familiar with Modo’s procedural textures. “I rarely use this technique. It took about five days to get the desired result,” said Tomoyuki. “And even after I decided to use procedural textures, the trial and error continued.” The effort was well worth it.

Runner-up Yusuke Yanagitani had a similar experience. For his entry, he designed a bowl of anmitsu. 

Cream Anmitsu by Yusuke Yanagitani. Second place.

Of all the ingredients in this sumptuous dessert, the kinako and matcha pieces proved to be a challenge to Yusuke. “I found that making texture changes to the kinako and matcha powder using normal methods didn't give the results I wanted, so I ended up using fur to create a more realistic look. However, I had forgotten how to use fur, so I studied it again by following a tutorial,” said Yusuke. Stepping out of one’s comfort zone proved to be the right move yet again.

But out of all the winners, the one who truly embodied not sticking to what you know was the other runner-up, Satoru Furutani. “This was my first time using Modo,” said Satoru Furutani. “Thanks to the user-friendly interface of the Modo software, I did not encounter any significant problems during the project. I was still able to create a project of a certain level of quality with just a few simple settings, without the need for extensive trial and error.”

Wow. Talk about being outside one’s comfort zone. Of course, this doesn’t mean that this is the first time Satoru tried 3D modeling. He is an experienced 3D artist but Modo wasn't the software he regularly used for work. Still, it was pretty gutsy to join a competition using the software you’re a novice at. You don’t exactly know where the controls are, you’re not sure which terms correspond to which parameters, and you’re unfamiliar with its menus. To finish as a runner-up winner in a contest after just a few days of tinkering with the software is spectacular and shows real skill and knowledge of the craft.

Takoyaki by Satoru Furutani. Second place

As if dealing with modeling software for the first time wasn’t difficult enough, this contest was also the first time that Satoru used a render farm for a project. “This was also my first time using a render farm, but I didn't have any trouble understanding how to use it. I found the process to be quite straightforward and easy to navigate,” said Satoru. Whether it’s luck or skill or both, things worked out well for him. Those takoyaki balls look delicious. 

Lesson #3: No 3D work is ever truly done

All three winners worked on their Modo contest entries on the side as a personal project. They all had day jobs that took most of their time and had to squeeze in a few hours here and there after work for the contest. As such, time was truly their enemy. All three felt the time crunch. And as amazing as their final output looked, all three felt that there was something that they could have improved on if they had more time, especially after they received feedback from the jury, other artists, and the public.

“I don't usually have the opportunity to receive feedback on my work, so I am grateful for any comments I receive,” said first place winner Tomoyuki. “When someone points out something I could improve, I regret not putting more effort into it.”

“Some feedback I received noted certain things that I wanted to do in my work but ultimately was unable to due to time or technical constraints,” said runner-up winner Yusuke. “Some feedback pointed out issues with the subsurface scattering settings, which made me realize that I needed to do some additional studying.”

“I didn't have much time for this project, so I decided to create a Takoyaki dish since it's one of my favorite foods and can be made quickly,” said runner-up winner and first time Modo user Satoru. “While I wasn't able to fully realize my original idea for this project, I believe that the result could have been even more interesting if I had been able to execute it as I had initially envisioned.”

This feeling of not being done, of wanting to push the work and do better, is also a feeling shared by all three winners after their experience with the Modo modeling contest. They won render farm credits and all three vowed to use them at some point in the future to pursue new personal projects.

For Tomoyuki Kato, it’s all about expanding his skills. “I haven't had many opportunities to do personal creative work,” said Tomoyuki. “However, I've decided to continue this year and explore not only still images but also video production.”

For Yusuke Yanagitani, he sees the render farm credits more as an ace up his sleeve. “While I don't have any specific projects in mind at the moment, I would like to keep the credits as a ‘last resort’ option for when I'm facing a tight deadline,” said Yusuke.

For Satoru Furutani, the cloud rendering credits could be used to further his exploits in self-expression. “Up until now, I haven't had much opportunity to engage in personal creative projects,” said Satoru. “Since I received the credits this time, I am considering some ideas. I would like to create unique works that can be understood at a glance.”

Judging from the glance that their contest entries provided into their level of skill and depth of artistry, these 3D artists are far from done. 

If you’re interested in seeing more work from these 3D artists, you can check out find more Tomoyuki's website, Yusuke's Twitter, and YouTube channel.

----

Originally published at https://garagefarm.net.

A texel density walkthrough for Blender artists

General / 30 March 2023

If you’ve ever played video games and appreciated the level of consistency in detail (or even noticed a lack thereof) among the 3D elements around your point of view as you traversed the game world, you have experienced the good (or bad) application of a concept known as texel density. Texel density refers to the number of texture pixels (texels) per unit of 3D surface area. To create a sense that the various props and sets belong to the same world, 3D artists must maintain a consistent texel density across all the 3D models. 

For video games, texel density is particularly important because it directly affects both the immersion of the players, and the performance of the game engine. A lower texel density can improve game performance but at the cost of lower texture quality, while a higher texel density can improve texture quality but can negatively impact game performance. 

When creating 3D renders as stills or animations, managing texel density is just as important for the same reasons, and in this article we’ll take a closer look at how to think about texel density as it relates to creating 3D scenes in general, and how to do it in Blender using a great addon by Ivan Vostrikov.

 Combining good texel density management AND an affordable online render farm service with deep automated support for your favorite 3D software is a match made in CG heaven! If you have any projects that need extra rendering power, give us a try! Signing up to our Blender render farm gets you up to $50 worth of render credits to test our service commitment free!

An intuitive understanding of texel density

Let’s have a look at these rock models:

Something doesn’t feel right, does it? If we take a closer look, we can see that the smallest rock has very crisp textures, while the largest rock’s textures are blurred, and the remaining rock is at an awkward middle. These rocks all share a single UV space, but the sizes of their UV shells don’t reflect their actual size in the virtual space they occupy.

The largest shells on the right belong to the smallest rock

By resizing the UV shells of each rock in accordance with its size, we’ll get a more consistent level of fidelity across all three. We can do this by applying a checker texture on the models and resizing the shells until the checker tiles on all rocks are the same size. 

‍That, in the most basic terms, is texel density. While the texel density of any given object or surface is an absolute value, the real importance lies in how proportionate the densities of surrounding objects are to it. To illustrate, let’s say we were preparing to create a render based on an image we found on Pinterest:

A snippet of the painting “Bedouins in the desert” by Alexis Girardet (the full painting is much more grand, but for our purposes we’ll use this cropped version shared by Pinterest user Yassir Hadi).

Texel density in scene creation

As we make our plans, it would benefit us later on to determine what texel density to work with as early as now. For this image, the ground could serve as a good starting point since it’s relatively close to where the camera would be. Let’s start by creating a plane with a checker map texture 4096 x 4096 pixels in size:

The texture detail at this size and camera range seems sufficient, so let’s go with it! Now that we have a point of reference, we would start creating our models and unwrapping them. Let’s assume that’s over and done with.

Here’s our scene at this point:

For this article, we’ll be working with the foreground elements and the characters’ clothing, but we’ll save the mountains and the characters themselves for a future article about UDIMs. Stay tuned!‍

We could approximate the texel density for each of the elements based on our checker mapped ground plane, but that would be tedious and thanks to the work of Ivan Vostrikov, unnecessary! Instead, we’ll use his handy Texel Density Checker addon, which is available for free, but certainly worth leaving a donation for!

Once you’ve downloaded the zip from the link above, just install as you would any other addon

Let’s pull up the addon from within our UV Editor:

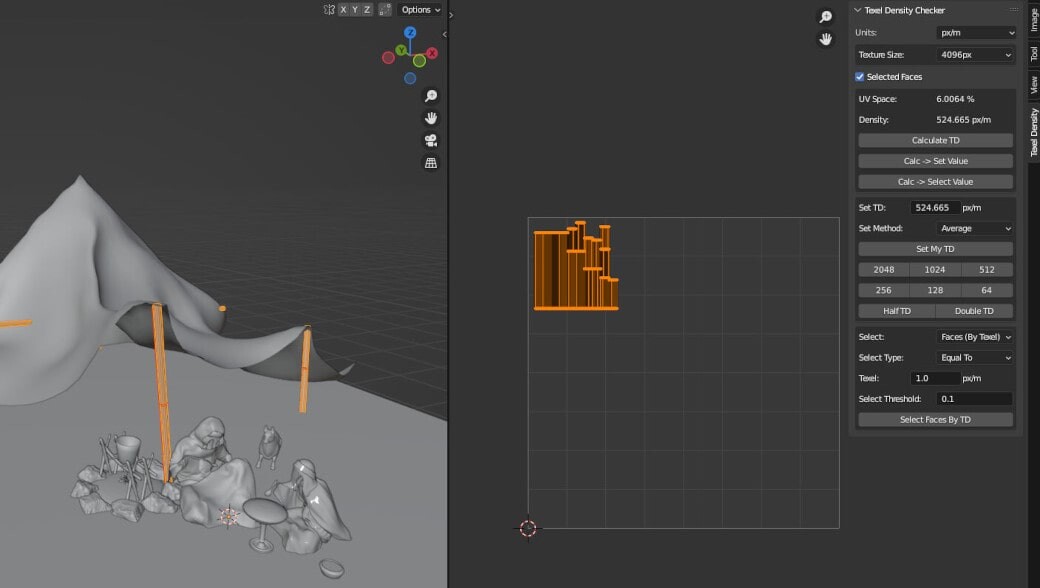
We have our ground plane’s UV shell occupying the entire UV grid, and we know our checker texture has a 4K resolution, so we’ll set our Texture size accordingly and (arbitrarily) have our units at pixels per meter.

By hitting “Calculate TD” we can see that our shell occupies almost 100 percent of the 0-1 grid, and has a density of 524.665 px/m. Let’s hit “ Calc-> Set Value” to establish this value as the point of reference for our other UVs:

Now if we select any other unwrapped mesh, we can use the “Set My TD” button to scale the UV shells or islands in proportion to the reference value.

Starting with the tent flaps, let’s select all the islands in the UV Editor and choose “Average” for the “Set Method” field in the texel density checker panel. Choosing average will scale all of the selected islands proportionally to the value that was set.

Let’s do the same for the tent poles.

Before setting TD
After setting TD

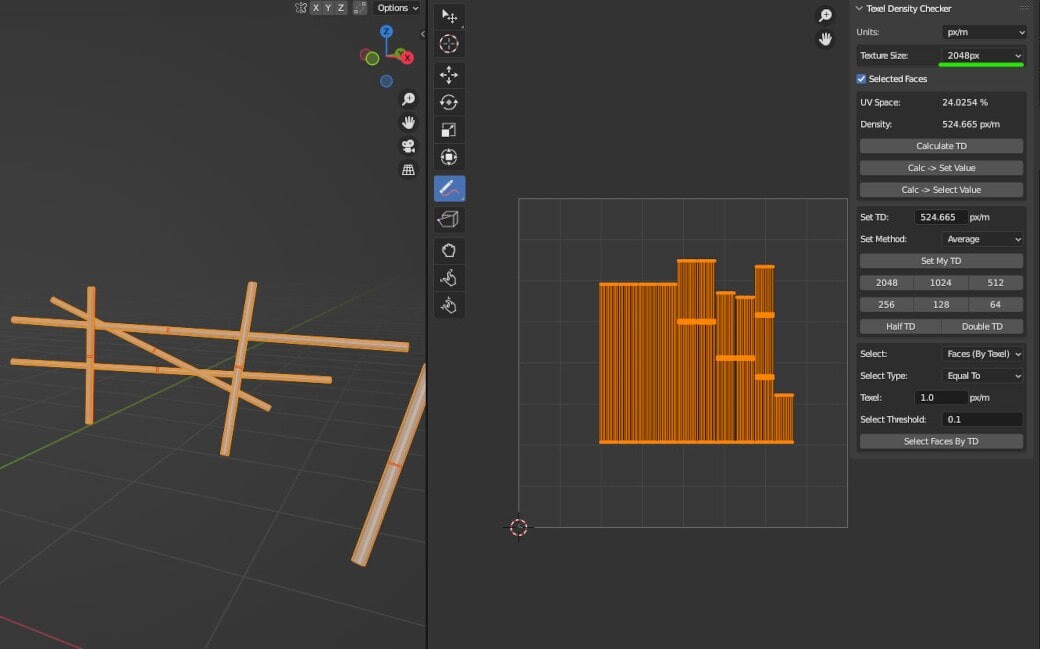
Since the poles are much smaller compared to the ground, the islands have shrunk correspondingly, and we’re now left with a lot of empty space in the UV Grid, which would be a waste of texture space. Here are some ways we can optimize things:


1. Change Texture Size


If we wanted a dedicated set of textures to this mesh, we could reduce the texture size.

By changing the Texture Size from 4096 to 2048 and hitting “Set My TD” again, we can make use of more texture space. 

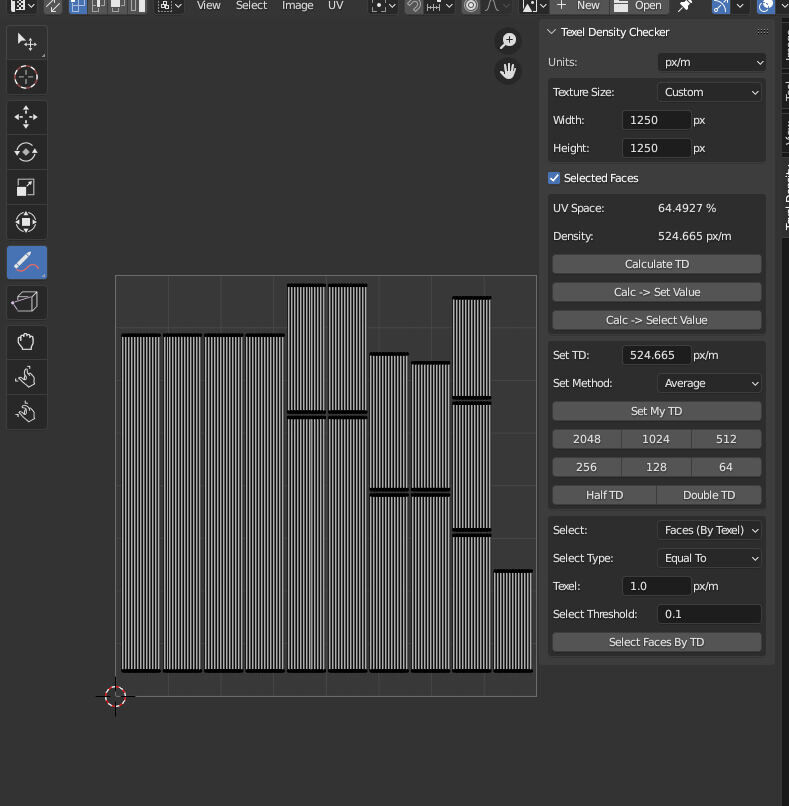
2. Set Custom Texture Size

A size of 1024 would have been ideal, but the islands were just a little too big for the grid. We could set a custom size to get around this, but that would mean having to work around any unpredictable tiling during our texturing phase.

Using a custom size of 1250 x 1250

‍3. Share UV Grid with other models.

Sharing the UV Grid with other meshes is the optimal way to maximize texture space and reduce the amount of maps your render engine will have to compute during rendering. This makes the project file lighter and render faster, though by how much depends on the number of models in the scene that use image textures. If we were to animate this scene and use an online render farm to render out frames, this method would help immensely in driving down expenses. 

The downside of this approach however, is that texturing each mesh that shares this UV grid will require more manoeuvring in our texturing application, especially if the meshes are meant to have different surface characteristics.In any case, we’ll use this tactic for our demonstration.

A note about UV layout

When using Texel Density Checker, there can be instances where setting the texel density on multiple islands at once leads to overlapping UVs. A workaround for this is as follows:

Use Blender’s annotate tool to mark the length of a shell. Then use the Pack Islands operation to ensure that everything is laid out well.


After, simply scale the islands down until the shell you used as reference aligns with your mark.

For the sake of brevity, let’s have a look at the final UV layouts for all the objects that were achieved using the steps outlined so far, (with a few changes here and there to some seams in meshes for better layout).

Tent poles and small props (Texture Size: 4096 x 4096)
Male character clothes (Texture Size: 2048 x 2048)
Female character clothes (Texture Size: 2048 x 2048)
Dog (Texture Size: 1024 x 1024)
Tent Flaps (Texture Size: 4096 x 4096)

Here is a density check for the render:

Every element that we worked on in the shot has a consistent Texel Density!

And here’s an initial render to serve as our work in progress:

Parting words

While the concept of texel density is more frequently discussed among game artists, hopefully this article has shown how essential it is for 3D rendering in general, as well as how to start incorporating it into your practice in Blender. Keep in mind however, that outside of creating assets for games there are much less technical constraints imposed upon you, and so the age-old wisdom of “if it looks good, it IS good” bears remembering. I hope this article was useful to you, and as always, Happy Rendering!

---

Originally published at https://garagefarm.net.

The Lone Ranger

General / 17 March 2023

Dots Core CEO DooHyeok Kim talks to us about his single-person studio and how he grew it with the help of a render farm

Being a 3D artist is fun but it is not easy. It is endless hours of toiling with the ins and outs of various software, each with its own arcane menus and settings and parameters. It is grappling with a million steps between modeling to rigging to texturing. Add another million for rendering. With every project, you are accountable for both the big picture and the small details in every single frame. 

Imagine dealing with all that. Then add to that the pressure, the hassles, and the challenges that come with managing the business side of a 3D studio – presenting work to the client, gathering and organizing their feedback, ensuring that the work meets both the budget and the deadline, figuring out how to accommodate last minute requests, coordinating with other vendors, so on and so forth. Basically, a million other things.

Now imagine doing all that alone.

That’s what DooHyeok Kim does. As the CEO and lone 3D artist of Dots Core, DooHyeok is both boss and manpower, head and limbs, brains and operation.

Curious to see an incredible anamorphic video by Dots Core showcased during the 2023 CES?


This video would be an outstanding piece of work for any team, regardless of size. However, the small team led by DooHyeok (he had to contract freelancers; yet another operational decision he had to make and implement as a CEO) had just 45 days to turn it all around. And as if that wasn’t difficult enough, they were also working on this other video for the same event:

Dots Core x GarageFarm

DooHyeok of course had help when it came to rendering these projects. He needed to enlist a render farm service in order to meet the tight deadline. 

“I worked on a total of 2,400 frames for the two videos and they were about 1 and a half minute each. It would have taken so long to produce it without using a render farm,” said DooHyeok.  

DooHyeok used to do all the rendering on his own computer but that proved impractical once the timelines for projects got crunched. “I used to render locally with my own machine before [but now] I use GarageFarm handling urgent work at the company,” said DooHyeok.

Rendering is such a complex process that errors are pretty much part of the equation. DooHyeok ran into an issue with a few frames in one project. GarageFarm’s 24/7 support staff came to the rescue. “Especially in an emergency, the support teams worked together solving the problems,” he said.

However, as happy as DooHyeok was with how the support team was able to help him out, the sign of a good online render farm experience is not having to need any support anymore. “Honestly in my recent experience, the rendering was so smooth that I didn't have to communicate with the GarageFarm support team at all,” said DooHyeok.

Flexibility in pricing is also key when using a render farm service. DooHyeok found a way of working with GarageFarm that perfectly suits his workflow, budget, and timelines. All relatively less complex scenes, he beams over to GarageFarm for rendering. Then if the project has some leeway in terms of the due date, he handpicks heavy scenes that are the most prone to rendering issues and renders those locally. “If a large amount of sequences were needed that fall within 2 minutes per frame, I think [the pricing] is very reasonable,” DooHyeok said.

The user interface is also crucial when it comes to cloud rendering. If uploading files to the render farm is a cumbersome process, that kind of draws away from the idea of using an online render service for its supposed speed. Not so with DooHyeok’s experience with GarageFarm. “In recent work, the plug-in and Beamer worked so well that I was able to finish the urgent project safely because I could just submit my jobs to render in GarageFarm and focus on the other work. My recent experience has been very much satisfying. The reliability of GarageFarm's own software helped a lot,” he said. 

Lastly, DooHyeok’s choice of GarageFarm for his rendering needs also has to do with his choice of 3D software. A render farm would do you no good if it doesn’t support your 3D software. In DooHyeok’s case, GarageFarm supports all of his go-to software: Houdini, Cinema 4D, and Redshift.

DooHyeok’s thoughts on the future of 3D

For DooHyeok, GPU rendering is the future. Its evolution offers to unlock more and more possibilities for 3D, particularly real-time rendering. Because GPUs have more cores than a CPU, it’s able to run rendering calculations in parallel, offering more speed and offloading rendering duties from the CPU which then allows the CPU to perform other tasks.

(If you have no idea what I’m talking about, here’s an article about GPU rendering that can bring you up to speed).

In line with this, DooHyeok is excited by developments with Unreal Engine 5. UE is the 3D software often used for games due to its real-time rendering prowess, but more and more is also used for cinematic purposes.

(If you also aren’t too clear about what real-time rendering is, read up about it here.)

As for 3D digital art (think NFTs, AI art), DooHyeok has an interesting take. He feels that as this field is becoming increasingly saturated and competitive, quality artistic expression becomes more and more precious. “As the audience’s taste is getting higher and higher, the 3D digital art industry is likely to become more competitive and the degree of difficulty goes higher unless artists create visually differentiated images compared to others. So, I would say it seems that your own expression technique or a unique look will be more important,” DooHyeok said. Sounds like DooHyeok is an advocate of the human touch in 3D.

(If you want to dive deeper into the topic of AI and its impact on art and 3D, read more about it here and here.)

Parting words

Going it solo in the world of 3D may not be for everyone. You need both mastery of 3D hard skills and managerial, operational, and business chops. But if you’re interested in trying your hand at starting your own single-person studio, perhaps DooHyeok’s beginnings in 3D offer some wisdom on how you can approach this endeavor. “I have been able to work in this industry with satisfaction. It seems to be important that we should try it without just being afraid of using tools,” he said. 

There’s no other way of knowing beforehand whether you can or can not succeed as a soloist in the 3D world. You just have to try it, if it’s something you’re interested in. You just have to set aside the fear and plow through. Fear is the only mind-killer.

Check out more works by Dots Core on their website or Vimeo.

----

Originally published at https://garagefarm.net.

How CGI and render farms brought Digidoubles to Cinema

General / 06 March 2023

A look at how 3D CG and render farms are used in films and TV shows to create digital versions of characters

Question: why would you replace a highly paid actor with a computer-generated double?

Answer: because you could. *wink wink*

Kidding aside, there are many reasons film producers and directors choose to recreate a full human (sometimes less than human, other times more than human; more on this later) using 3D for a scene or even a whole film. These reasons can range from budget constraints to time crunches to actor schedules or contract issues (not a joke) to safety concerns to the impossibility of achieving the director’s vision via practical effects and live-action shots.

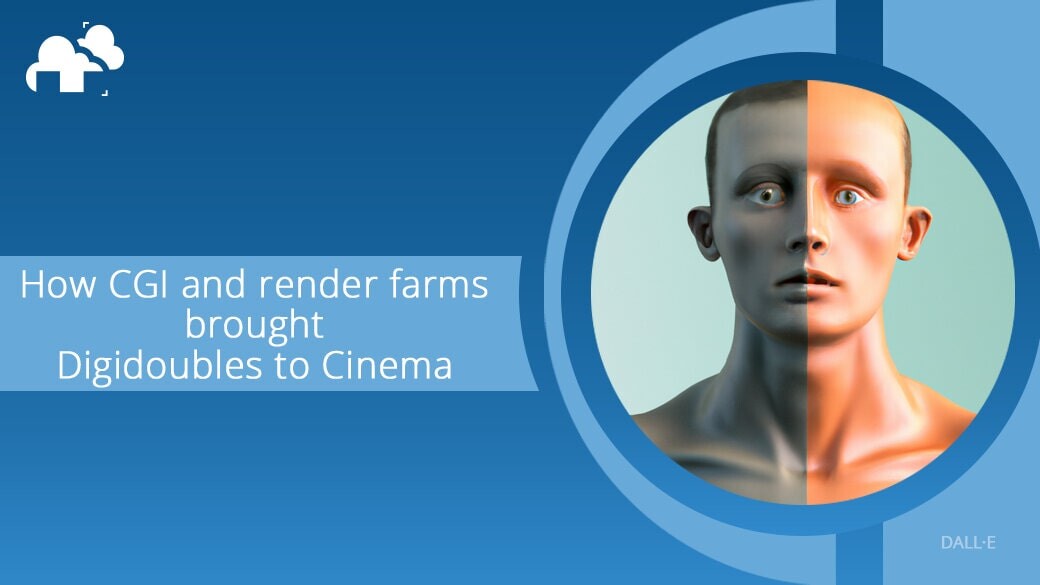
And the results achieved with digidoubles are as varied as the reasons behind using them. When done right, digidoubles are indistinguishable from real actors, and scenes employing CGI models flow seamlessly with scenes with real live footage. When done wrong, the results can be horrific, laughable, or uncanny (quick digression here: “uncanny valley” is a term that is used in cinematic and VFX circles to refer to a digidouble that may seem human but elicits an eerie feeling from viewers due to its artificialness and failure to fully capture human expressions. Think deep fakes). 

Uncanny Valley. Credit:  AlteredQualia, Fractal Fantasy (Flickr.com)

Now, bad digidoubles are a result usually of two things: time crunch or budget constraints. These two issues are where render farms can help out production. Render farms, by virtue of having hundreds of powerful machines all dedicated to rendering frames for various projects, are leaps and bounds faster than rendering locally on any one machine. Scenes that would take hours or days to render on your computer can be completed in minutes or hours. It’s sheer hardware power. At GarageFarm, you get to choose which kind of CPUs or GPUs you’d like to handle your project (check it out here). 

As for the budget side: sure, almost every render farm service charges a fee. But rendering using your own computer shouldn’t be seen as “free” since doing that ties up your CPU; meaning, you can’t do anything else. And every hour your computer sits there rendering is an hour you are not able to work on other scenes or projects. And what happens when after waiting for hours on end for your project to render on your computer it turns out there’s an error somewhere? All those hours will have just been for nothing. At our cloud render farm, the fee also goes to having a 24/7 support team that is on standby should there be any issues regarding your project.

(Curious how fast and how much your project can be rendered with GarageFarm? Test out scenarios with our cost calculator.) 

Now that we know what digidoubles are, let’s take a look at some examples.

The Lord of the Rings: The Two Towers

Some of the best

Gollum. Peter Jackson’s technical prowess combined with Andy Serkis’ superb acting brought to life Gollum, one of the most memorable CGI characters of all time. You might argue that Gollum isn’t technically a digidouble because the CGI version doesn’t substitute for a real actor. But I dare you to find a 3-foot 6-inch human with pear-sized eyes and feet of a 7-footer who can deliver the same powerful dramatic performance as Andy Serkis. In fact, this even makes the technical achievement of Jackson’s Lord of the Rings trilogy even more miraculous. I daresay Gollum can even out-act some real-life actors right now. Now, behind the lonesome Gollum are hundreds and hundreds of computers set up by Weta Digital in its own rendering farm in order to bring to life this one-of-a-kind creature on the big screen.  

Davy Jones. This villain from The Pirates of the Caribbean franchise is considered by many as the best digital character (again, not strictly a digidouble; more of a digibeing) of all time. The filmmakers took absolute pains in designing and crafting the look of this menacing squid-man. Perhaps the secret sauce in designing this digital villain lies in the decision to integrate the actor Bill Nighy’s actual eyes for the character in the final output and not compose the eyes in CG. 

Pirates of the Caribbean: Dead Man’s Chest

Another genius move by the creators was to turn the weakness of the medium into an advantage: back in the day, 3D renders tended to have a sheen or gloss to them that made human or animal skin unrealistic. But since Davy Jones is a squid-man and is always glistening with wetness, the sheen worked for the character’s look. Davy Jones was crafted by the prestigious CG company Industrial Light and Magic (ILM). ILM has its own dedicated render farm, the specs of which sound hyperbolic to people outside of the industry: 7,000 processors outputting a total of 1 petabyte of data every 24 hours. The machines run so hot that ILM needed to install an air conditioning system fit for a jet engine. 

‍The Na’vi in Avatar. James Cameron is a master world-builder and that includes his excellence in bringing non-human species to life. The Na’vi are human-like in their form and expressions but they are 9 to 10 feet tall and their skin is blue. Similar to Gollum, the production used motion capture extensively to give expression and movement to the Na’vi. Cameron and his team figured all that out and more to bring forth breathtakingly detailed and convincingly realistic digidoubles digibeings. Like Gollum, the Na’vi and the rest of the world of Avatar were rendered by Weta Digital and its own render farm built on a 10,000 square foot property in New Zealand.

‍Marvel’s superheroes and villains. From Hulk to Ant Man, Iron Man to Thanos, Spidey to Captain Marvel, the films in the Marvel cinematic universe are replete with convincing, cool, and badass digidoubles. Rendering a full human body into CG is par for the course for Marvel’s CG artists: all of Spider-Man’s scenes in Civil War are all digidouble’d because Tom Holland joined the cast late (one month into the shoot) and 3D was the most efficient way to bring him in as Spidey. Besides, it’s easier for production to render his spider suit in CG than craft it in real life (it’s made of fabric with metallic inlays and whatnot). Plus, it’d be suffocatingly hot for Tom Holland to act with his mask on for hours on end. 

Marvel’s artists also do partial digidoubling on actors, like how they rendered Tony Stark in 3D from the neck down when he has his helmet off, or Steve Rogers’ feet in a scene where he was running barefoot, or the suit the Avengers wore when they jumped into the time machine (production team couldn’t finalize the design in time for the live shoots so they CG’d in the final design instead). With these movies all produced under Disney, safe to say that ILM has had its hand on creating these digidoubles. This means that the artists who worked on these digidoubles have had access to the enormous power of ILM’s own render farm. 

Some of the worst

Neo in Matrix Reloaded. The first Matrix film introduced visual effects and filming techniques that are in some way still being used to this day. It was that revolutionary and cool. In the second film of its trilogy however, there is a sequence where Neo fights an endless stream of Agent Smiths that looks like a cut scene from a PS2 game. Neo looked doughy, his skin seemed inhuman, and his signature black coat looked glued to his body and seemed made of rubber. It was bad.

The Matrix Reloaded

‍Renesmee. The baby revealed at the end Twilight: Breaking Dawn is the living, breathing definition of Uncanny Valley. The infant’s face looked human enough but…there was something eerie and disturbing about it. For one, you could tell that the face was superimposed to the live action scene; something about the lighting made the baby’s face look detached from everything else. Perhaps the idea itself behind the character was odd in itself – being half-vampire, the creators wanted a baby that was outwardly infantile but inwardly mature, since her vampire powers make her advance and grow rapidly (Renesmee was able to talk just 7 days after being born). At any rate, no one seemed delighted to see this baby, audience and cast alike.

‍Scorpion King in The Mummy Returns. I like Dwayne Johnson and he always looks cool and awesome wherever you see him but…not in this film. They tried to pull off a half-human, half-scorpion monster villain but it looked like they ran out of time for his scenes. The Scorpion King looked doughy, lacked detail, and had an unfinished look to it. The Scorpion King render was so poorly lit that it looked out of place in the environment. The Scorpion King visuals had no, um, sting.

The Mummy Returns

Creating a digidouble

We can’t possibly detail here all the ways you can create a digidouble the same way we can’t possibly list down here all the digidouble there ever were. Allow me however to outline for you one way to create a digital version of a human for cinematic purposes if you don’t have the budget, manpower, and timeline of a Hollywood studio. 

‍Step 1, photogrammetry. This is the step where you take reference photos of the person you want to create a digidouble for then feeding these photos into a software that creates a mesh from those photos. One such software is Meshroom. The output from this phase, your mesh, will be your reference for the next step.

‍Step 2, modeling the head. Software like the Blender addon Human Generator or MakeHuman or MetaHuman give you human presets that you can refine further. This saves us from sculpting our digidouble from scratch which, I don’t need to tell you, is a laborious and time-consuming process. 

So you take your mesh reference and a full body reference photo, open these up in the software, then line up a close-enough human preset to your reference mesh and photo. From here, it’s now a matter of continuous pushing and pulling on the 3D model and adjustments on the sliders to now get the preset to look like the person you’re trying to model. Here you’re matching the length and curve of the nose bridge, the depth of the eye sockets, the protrusion of the cheekbones, so on and so forth. You can also choose and fine-tune the correct skin texture while you’re here. This stage is not unlike the character creators in RPGs or even in NBA 2K. 

‍Step 3, hair. Hair is an important visual aspect for any character so it’s important to get this right as well. After you’ve modeled your digidouble’s head, you can next choose the closest hair preset for your character and customize from there. When I say hair, this includes hair on the head as well as eyebrows, eyelashes, and facial hair. This is the easy way. The harder way involves manipulating vertex groups along with hair properties. This is more complicated but yields more accurate results.

‍Step 4, fine-tuning. By this point, it’s not expected that you already have an accurate digidouble. You have a human, sure, but it most likely still looks like somebody else (or nobody). So the next step involves rounds and rounds of adjustments to be able to sculpt in the finer details of the face. This is where you need to pay close attention to facial proportions, eye shape, how the lips bulge, etc. Take your time dialing in the details; more time spent here leads to better results. Our eyes have evolved to recognize faces and as such are attuned to detect the smallest differences in people’s faces. So if you want to give your digidouble the best chance to pass for the real thing, you’d want to get even the tiniest detail right. 

Step 5, clothing. Again, most human-generating 3D software have a ton of presets you can choose from so just pick the most apt clothing for your digidouble here.

Step 6, rigging. Now, it’s time to make your digidouble move. We won’t go into full detail here but what’s important to understand here is that this is where you map your digidouble’s face and body joints onto points that let you manipulate the digidouble for various facial or body movements. This step is really a hundred steps, just like each of the steps outlined previously. Perhaps I’ll be writing an article about rigging next, so stay tuned.

Digidoubles and rendering

As with anything 3D, digidoubles need to be rendered just like any other 3D element in your scene. This is where render farms come in. Digidoubles are 3D objects composed of polygons and textures and materials that interact with light and as such also would require serious computational power to be converted for proper display on 2D screens along with the other 3D elements in the scene that these digidoubles find themselves in. And since Hollywood-level productions are always pushing the limits of how realistic digidoubles can get, the demand for rendering power gets pushed as well. 

The earliest digidoubles for film were rendered on computers running on – wait for it – 2MB of memory (if you think about it, these machines are the grandfathers of the rendering machines in render farms!). While this sounds laughable now, back then in the 80s, this was cutting edge. So the more filmmakers and animators want to improve the realism and accuracy of digidoubles, the more the hardware requirement for rendering them gets. 

Conclusion

We are in the golden era of visual effects and digidoubles are a huge part of it. For better or worse, I can only predict the continued increase in their usage in films and shows. While this perhaps puts a premium on, or at the very least lends a kind of prestige to movies like Top Gun: Maverick that prides itself in using zero CGI, the fact that digidoubles in particular and CGI in general are marching inexorably on towards more and more realism kind of renders the issue moot. I mean, if you can’t tell anymore whether what you are looking at is CGI or not, will it matter?

Digidoubles are here to stay.  

----

Originally published at https://garagefarm.net.

Cinema 4D and After Effects

General / 13 February 2023

Combining the best of both worlds 

The overlap between 3D, 2.5D and 2D is seen everywhere in many different verticals, including in VFX, Broadcast, Animation and Motion Graphics. Combining these different styles can create an intriguing and unique design that engages your viewer. Being able to easily mesh these styles together can be accomplished using both Cinema 4D and After Effects. 

Cinema 4D is a fantastic 3D modeling and animation platform with a host of powerful motion graphics tools. It is fast, powerful and flexible and has an easy learning curve compared to other 3D platforms. After Effects is a well-known VFX, motion graphics, and compositing software. Both are often used in tandem to create wonderful animations for many different applications. From YouTube content creation to Super Bowl ads to feature films. The power of both Cinema 4D and After Effects together is limitless.

 When it then comes time to render, our online render farm provides you the ability to upload straight from either application's interface using the integrated renderBeamer plugin. Setup is fast and simple while also supporting many of the industry standard plugins. GarageFarm.NET boasts both CPU and GPU cloud rendering as well as server rentals with very competitive pricing scales to fit your needs as well as fantastic 24/7 support.

Credit: Marty Laurita (Software: Cinema 4D, After Effects, Keyshot)


Does Cinema 4D come with After Effects? 

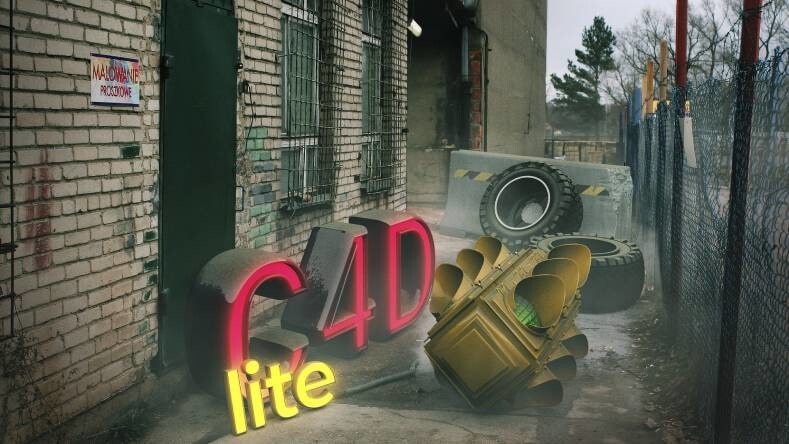
The common question is, does Cinema 4D come with After Effects? The answer is yes, but only to a degree in a slimmed-down Lite version. For some users, this will meet their needs perfectly. By purchasing After Effects, you will be able to use Cinema 4D Lite for free. Those of you out there looking to animate a quick logo, text or possibly add other simple 3D elements to your After Effects compositions, Cinema 4D Lite is perfect for you. However, Cinema 4D Lite does come with quite a few restrictions, such as rendering limitations, lack of modeling tools and most mograph tools, and there is no plugin support. 

Included with Cinema 4D Lite, though, is the all-powerful Cloner feature. This will give you just a taste of the immensely capable MoGraph toolset inside Cinema 4D. If you want to get in-depth with your animations and have full use of the MoGraph tools as well as many other features, you will need to look at purchasing or subscribing for a full copy. Anyone really looking to get into 3D motion graphics, this is where you want to be. Cinema 4D is relatively easy to learn but also sophisticated enough to tackle the most complicated of jobs.

Source: Maxon.net


Simple integration 

Whether you decide to stick with C4D Lite or opt to go for the full-fledged software, both integrate wonderfully into After Effects through the Cineware tool. Allowing you to bring your Cinema 4D file directly into After Effects, you can then place it in the composition just as you would any other element. You will be able to see your 3D scene right in your composition. 

Cineware gives you a ton of flexibility, adjusting render settings, textures, and passes to favor quality or speed. You can also enable Live Link, which will synchronize both your After Effects and Cinema 4D timelines. It is easy to make updates as well, just save any changes in your C4D file and it will automatically update inside of After Effects without any issue. Once you have your scene imported, you can then extract very useful data such as cameras, lights, and null objects. These items can then be used to animate with.

Images sequences or media files are often rendered out of C4D and the composited inside of After Effects. Adding in the ability to directly import your 3D file, allows you to be more flexible when animating and confident when it comes time to hit that render button.


Useful workflow 

One very useful workflow that I find myself using quite often is the compositing tag inside Cinema 4D in conjunction with After Effects. If you have this tag applied to an object you can then extract that data out in After Effects and have a null object to use and attach other elements to. This is quite useful when animating screens on phones, tablets, or monitors where you need to attach a piece of media to the device and have it track around in a scene. Working in this manner with both Cinema 4D and After Effects makes for a fantastic workflow that is flexible and easy to edit.

Credit: Andrew Phang (Software: Cinema 4D, After Effects, Adobe Illustrator)


Simple, intuitive, powerful 

In the end, Cinema 4D and After Effects go perfectly hand in hand. Giving you the flexibility to work with whatever makes sense for you. Whether working with Cinema 4D Lite keeping both the cost and learning curve down, or opting for the full Cinema 4D Studio. Cinema 4D Lite is perfect for the motion graphic artist just starting to dip their toe in 3D and wanting to get a feel for what C4D can do and the creativity it can unlock.

Whatever your choice, you can feel confident that GarageFarm.NET has you covered. Integrated plugins allow you simple, safe, and secure rendering for a variety of different applications. Having the confidence that their 24/7 support has you covered is fantastic. And being able to contact them through email, calling or immediately through online chat.

---

By Alex Jerome

Originally published at https://garagefarm.net.

3D artist insight: Render farms and when to use them

General / 09 February 2023

As the digital world continues to expand, the demand for high-quality still and animated content is growing at an unprecedented rate. While this is an exciting time for creators, it can also be incredibly stressful due to the pressure of tight deadlines. The solution to this problem is to rely on more powerful tools, but sometimes this is not enough. Even if we have the latest workstation with high-powered processors, we may still encounter issues with deliverables. This is where render farms come in to save the day.

If you're looking for a powerful and reliable render farm service, look no further than GarageFarm.NET! Their state-of-the-art render farm is perfect for Cinema 4D users working on animated projects, as it can improve the quality, efficiency, and scalability of work. They have a team of experienced professionals who are dedicated to providing you with the best possible service. Their service plays very well with C4D workflows and has a team of 3D experts that will help ensure rendering goes smoothly.

Credit: Murat Sayginer “Pearl”

What are render farms, and where did they come from?

But what exactly are render farms? A render farm is a collection of computers that work together to render images and animations. The concept of render farms originated in July 1990, when the team behind the animated short "The Bored Room" realized that they wouldn't be able to complete the task by the due date. To solve this problem, they filled a room with Compaq 386 computers and used them to render each scene or sequence. The results were then "harvested" and collected on a storage drive before being edited. This process, known as "render farming," was born.

Over the decades, technology has evolved and render farms have become more powerful and efficient. However, even with the latest tools, it can still be challenging to meet tight deadlines and high-quality standards. Enter the online render farm, offering artists the computing power they need to meet client expectations and schedules without having to manage the equipment themselves.

Credit: Nabil Ali

What projects need render farms?

For C4D users, a Cinema 4D render farm can be especially beneficial for motion graphics and animation projects. These types of projects often require large amounts of rendering power, and a render farm can improve the quality, efficiency, and scalability of the project. When creating animations or sequences, it's essential to check and create small previews or iterations of the project to ensure everything is on track and animated smoothly. If you find yourself hitting a deadline wall or your GPU is on the brink of explosion, it may be time to consider using a render farm service.

During the creative process, it's also common to periodically submit small or partial previews for an art director or client and since the closer to the final your work in progress is, the more accurately they can provide feedback (in the case of an animation or a movie). It is also otherwise very difficult to ensure everything is okay, and all the details are as they should be. At the latter stage of the process, it becomes more or less clear if the tools we have are going to suffice our needs and allow us to complete the project on time or not. Even though using a cloud render farm can rack up immediate costs, it tends to be the better alternative than having to continuously ask for extensions on a project, straining relationships with clients or directors, and wearing down our processing units.

By doing a simple math operation, especially when it comes to rendering animations or sequences, we can figure out in advance how much time it is going to take to get the job done and hence decide if this is the case or not to search for the help of a render farm service. Assuming that you are creating a one-minute animation with 24 frames per second, the total number of frames that need to be rendered is 1440. If you have a workstation with a powerful GPU, the render time might be around 30 minutes per frame. This means that the total render time for the one-minute animation is 720 hours. If you are facing challenging time constraints and need to deliver the animation in less than a week, this would clearly be an impossible task. However, if you use a render farm service, the render time can be significantly reduced to the time it would take to render a single frame.

Credit: Nathan Giordano

Summary

Render farms are powerful tools that can help creators meet tight deadlines and produce high-quality animations and images. For Cinema 4D users working on motion graphics projects, render farms can be especially beneficial, improving quality, efficiency, and scalability while freeing artists to focus on the creative process.

When looking for a render farm service, it's important to consider factors such as cost, turnaround time, and the types of projects they can handle. Some render farms specialize in specific software or rendering engines, so it's important to find one that is compatible with your workflow. Additionally, it's important to ensure that the render farm has a good reputation and is known for producing high-quality results.

In addition to improving the quality and efficiency of animation projects, render farms can also be used to improve the realism and complexity of 3D models and environments. For example, they can remove the need to cut corners in favor of render speed, which will make it easier to create realistic lighting and reflections, or add details such as hair and fur to characters. This can be especially useful for projects such as feature films or commercials where high-quality visual effects are required.

Overall, render farms are a valuable tool for any creator looking to improve the quality and efficiency of their work. Whether you're a motion graphic artist, a VFX artist, or a 3D modeler, a render farm can help you produce high-quality results in a timely manner. With the right render farm service, you can focus on the creative process and leave the heavy lifting to the computers.

---

Originally published at https://garagefarm.net.

3D render farms and the democratization of animation and VFX

General / 07 February 2023

The animation and visual effects (VFX) industry has always been dominated by large studios with access to expensive hardware and software. But thanks to the advent of third-party render farms, that isn’t the case anymore. Cloud render services are quietly and steadily making the way animation and VFX are produced more feasible for independent artists and storytellers, making it possible for smaller studios and individuals to produce fresh and unique content without needing to build a render farm themselves. In this article, we'll take a closer look at how 3D render farms are changing the game in animation and VFX.


As an online render farm ourselves, we’re happy to play a part in bringing stories to life with CG. That's why we offer our clients state-of-the-art render farm services with the latest technology and 24/7 support. Whether you're a small studio or an independent creator, our render farm services will help you take your animation and VFX projects to the next level.

If you’re working on an animation, check us out for generous starting credit and discounts, and affordable pricing!

What are 3D render farms?

A 3D render farm is a collection of computers that are connected together to perform rendering tasks. In animation and VFX, rendering is the process of creating the final images or videos from 3D models and animations. The more computers you have working on a render, the faster the rendering process is completed. Render farms allow multiple computers to work on each frame in a project’s animated sequence simultaneously, significantly speeding up the rendering process.

Rendering 3D animations can be a common pain point for creators because of the time it takes to render even a single frame for complex scenes. This is particularly true for animation and VFX studios that are working on feature films or other high-end productions with large amounts of visual effects. The rendering process can take days, weeks, or even months to complete depending on the complexity of the scene and the resolution of the final images. This can put a significant strain on animation studios' resources and delay the completion of projects. A cloud render farm is a service that allows you to access and use remote servers over the internet for rendering your animations. These servers are typically owned and maintained by a third-party company and are located in remote data centers. Cloud render farms offer many advantages, such as scalability, flexibility, and ease of use. They allow users to easily scale up or scale down their rendering resources as needed, and they do not require any upfront investments in hardware or maintenance. Additionally, cloud render farms are accessible from anywhere, at any time, making it easier for remote teams to collaborate on animation projects.

On the other hand, a local render farm is a system that is set up and maintained on-premises. It typically consists of a group of interconnected computers that are located in the same physical location. A local render farm offers more control over the rendering process, as you have direct access to the hardware and can customize the system to your specific needs. However, it also requires more maintenance and can be expensive to set up, especially for small animation studios. Additionally, it is not as scalable as a cloud render farm and can be limited by the number of machines available in the local network.

Smaller studios and independent creators

One of the most significant impacts of 3D render farms has been on smaller studios and independent creators. With the ability to outsource rendering to a render farm, these studios and creators can focus on the creative aspects of production without restrictive operational expenses. This has led to a proliferation of new creators in the animation and VFX industries, allowing for more diverse voices and perspectives to be represented in the medium.

For example, thanks to the ability to allocate resources to rendering on-demand, creators and small teams can now produce high-quality animation and VFX on a budget that would have been impossible a few years ago. As a result, there has been a surge in the number of independent works in the market. 

The increased availability of high-quality animation and VFX has made it possible for more people to access and enjoy more types of content, which would have been considered too niche or even outlandish in the past. Funding platforms and Social Media are perfect avenues for short-form content that can grow into something bigger and they also make it easier for benefactors to gauge interest in a project, reducing the amount of gate-keeping in 3D production. 

Marina Nakagawa. Unseen Garden

Increased efficiency and cost-effectiveness

The use of 3D render farms has also led to more efficient and cost-effective production in the animation and VFX industries. With the ability to outsource rendering, studios and creators can save on hardware, electricity, and maintenance costs. This, in turn, makes the final product more accessible to the general public, as the cost savings can be passed on to consumers.

In addition, using 3D render farms has also made it possible for small groups and individuals to take on larger and more complex projects that would have been impossible to complete with a single computer. This has brought about an increase in the quality and scope of animation and VFX projects and a decrease in the time required to complete them.


The future of animation and VFX

Diversity in filmmaking, including in the field of 3D animation, is crucial for ensuring that a wide range of voices and perspectives are represented on screen. Having varied representation in the film industry, in terms of both the creators and characters depicted, leads to a wider range of stories being told and a more accurate reflection of society. It also helps break down the stereotypes around the “CG” look and promote an appreciation of the medium.

In the field of 3D animation, this is especially important because it has the potential to reach a wide audience and has a significant impact on popular culture. However, the 3D animation industry has historically been dominated by a narrow range of stories and visual styles, which can limit the its potential for artistic expression and cultural impact. By embracing diverse perspectives and visual styles, storytellers using 3D animation can create a wider range of content that appeals to a wider audience and helps 3D animation, in particular, to be appreciated as a type of production, more than a single look or style.

Blender Studio’s Sprite Fright is an exemplar of what independent visionaries have at their disposal all the means necessary to bring their stories to life.

Overall, having diversity in the animation industry is vital for creating a more inclusive and equitable culture. It allows for more varied and interesting stories to be told and for the medium to be recognized as a powerful tool for artistic expression and cultural impact. With online render farm services available to everyone, we get a wider range of animation and VFX-driven content that appeals to a broader audience. Additionally, the increased efficiency and cost-effectiveness brought about by 3D render farms will make it possible for more people to access and enjoy 3D animation that suits their taste and more immersive independent short films. 

With online render farm services available to everyone, we get a wider range of animation and VFX-driven content that appeals to a broader audience. Additionally, the increased efficiency and cost-effectiveness brought about by 3D render farms will make it possible for more people to access and enjoy 3D animation that suits their taste and more immersive independent short films.  

In the coming years, we expect to see even more advancements in the use of 3D render farms, leading to even more efficient and cost-effective production and even higher-quality animation and VFX. This is an exciting time for the animation and VFX industries, and we can't wait to see what the future holds.

---

Originally published at https://garagefarm.net.


How Blender excels as an architectural tool

General / 06 February 2023

Before the time of 3D rendering, designers relied heavily on traditional hand-drawn illustrations to capture how their designs would look in the real world. These highly accurate drawings became the cornerstone of what 3D archviz is today. In fact, many firms still use 2D drafting as part of their creative process. But times have also changed; almost all architectural projects now utilize 3D rendering in some aspect of their pipeline, as access to 3D tools has made 3D visualization cheaper and easier. 3D visualization has opened the doors for next-level realism and the ability to preview buildings integrated into their environment through still frames, animations, and XR experiences. 

Credit: Adam Szabo 

Blender, the open-source 3D package, is one of the most popular and versatile tools available for architectural visualizations. It has a uniquely flexible feature set that has made the software an increasingly popular tool for visualizers. In this article, we look at what can be done with creating architecture in Blender and what it has to offer for designers, architects, and artists creating 3D visualizations. Blender is easily underestimated, but as you’ll see, it can be a great choice for architectural projects.

Blender for architecture

Starting with the obvious, Blender is a powerful tool for rendering. Blender supports a wide array of render engines, from photo-real renders like Cycles, Octane, and V-Ray to 2D toon rendering with Eevee, and Grease Pencil tools. Because Blender is open-source by nature, it supports a larger set of render engines than most 3D software, allowing artists to use the tool that best fits their needs. This aspect can also be beneficial when integrating Blender into a larger pipeline where a render engine may already be core to a team's workflow.

Credit: Jonathan Gabriel

 Apart from external renders, Cycles, Blender's built-in path-tracer, is a powerful visualization tool in its own right. With features like global illumination, path-guiding, caustics, and both CPU and GPU rendering, it's a great choice for rendering architecture in Blender. Additionally, Cycles supports 360 renderings for generating VR content. Cycles has been in development for over ten years now and is now one of the quickest photo-real renderers out there since the recent release of Cycles X, the latest optimization-focused release of the engine.

When it comes to 2D rendering, Blender has slowly grown to have a strong 2D rendering feature set too, including line art rendering and tool-shading using either Cycles or in Eevee, Blender's real-time render engine. While 2D rendering may not be your primary need, it’s a convenient addition that yet again demonstrates Blender’s versatility for designers.

Credit: Samuel Woodward

Blender's extensibility through add-ons also shouldn't be understated. Tools like Blender GIS, Archimesh, or Grasswald, to name a few, allow artists to bring entirely new feature sets into their workflow. Blender GIS integrates geographic information straight into the 3D viewport for visualizing buildings in real-world settings; Archimesh is an architectural design tool for easily building parametric architectural models; and Grasswald instances realistic foliage models directly into 3D archviz scenes. And that’s just to name three. There are hundreds of additional addons available across the web for all kinds of workflows and tasks.

Reinventing the meaning of 3D software

It's clear that Blender has a great set of features. But how does it compare to the competition? Regarding drafting, Blender has a surprisingly good toolset for an artist-oriented program, including support for NURBs, complex measurements, and even parametric modeling through the CAD Sketcher add-on. However, it doesn't boast a toolset that can come close to the feature set of software like AutoCAD, Revit, or Rhino. It's the post-CAD steps where Blender really shines as a competitor against software 3ds Max, Cinema 4D, and Lumion.

Credit: Victor Duarte 

While all of these tools are competent tools for archviz, what these tools lack is a concise and cohesive workflow. That's where Blender steps in as a great multipurpose tool for archviz that goes beyond simply modeling and rendering tools. Blender supports advanced sculpting and modeling tools, texturing painting, animation, and virtual reality content. It's possible to create complex scenes quickly and without jumping between a myriad of external tools.

So…should you switch?

Switching software can be difficult, but since Blender is both free and versatile, the process is less painful than most transitions. Being free, there's no need to account for additional costs or overlapping license agreements. Because of this, many studios choose to implement Blender into their pipeline over time, making the process less intrusive for designers still trying to hit deadlines during pipeline changes.

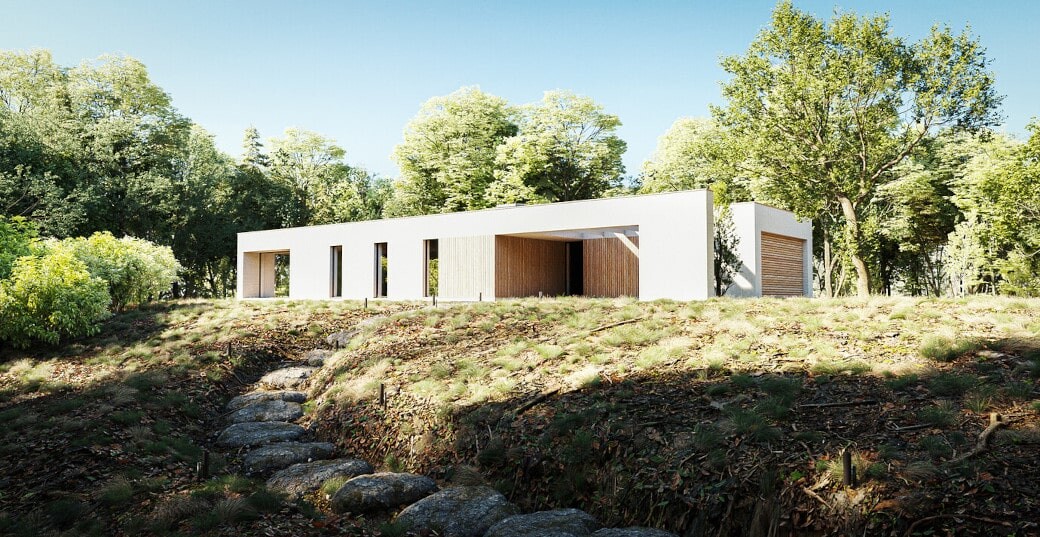
Credit: F3D Studio

Blender is also a great choice for architects looking to expand their in-house offerings into 3D visualization. It's a lightweight yet professional tool for the visualization of CAD projects or mockups of  in-progress designs. Having the ability to quickly render off visualizations without consulting outside studios or investing in licensed software can be a huge time and cost saver.

Furthermore, Blender's all-in-one workflow allows for quick and efficient modifications anywhere in the creative process. For example, if a project requires modifications to the overall structure of a building, you can change these features in real time without leaving the software or even the viewport. The same also applies to texturing and animation, limiting the amount of backtracking or re-exporting needed along the way.

As an open-source tool,  Blender is also not only incredibly cost-effective to implement in a studio setting but also highly expandable and extensible. As already mentioned, Blender's community is constantly building new add-ons and tools that integrate with Blender for faster workflows and better renders.

So should you switch? Maybe. If you’re looking for a new tool or to take your first steps into visualization, then Blender is a great choice. If you rely heavily on CAD tools as the backbone of your workflow, then Blender may be better as an addition to your workflow, rather than a replacement. 

Conclusion

While rendering architecture in Blender may not be the natural choice, it isn’t a bad one. Blender is truly more than the sum of its parts by providing a complete package of 3D tools and rendering options that can rival its competitors while being free and accessible for all. Its thriving community and strong add-on repository make it an unmatched tool in flexibility and extensibility for artists, designers, and architects from any background. No matter your goals, you should download Blender and give it a try! It may surprise you how useful it can be for the smallest, or largest of things.

If you’re interested in learning more about rendering architecture in Blender, check out our article on why you should learn Blender for archviz here, or check out our intro on how to use Blender here. And if you’re already using Blender for rendering visualizations, be sure to check out our Blender render farm and get 33% off all Blender rendering.

----

Originally published at https://garagefarm.net.

Creating archviz virtual tours with RDVIS

General / 25 January 2023

RDVIS is a small studio founded seven years ago specializing in photorealistic architectural visualization. The studio provides top-of-the-line 3D renders, animations, and virtual tours of not-yet-built projects to clients around the world. Today we're talking with Robert, an artist at RDVIS about their work, the industry, and how they're using GarageFarm to complete their projects and push forward new technology.

If you're interested in learning more about how GarageFarm is supporting artists and studios with cloud rendering solutions, visit our online render farm to receive $50 of free render credit towards your first project!

Meet RDVIS

Robert, the primary artist behind RDVIS, started his career in the game development industry, where he fostered his interest in archviz by utilizing real-time gaming technology to explore and design public projects. From there, Robert started RDVIS. Now, the studio focuses wholly on how to create the best digital content for architectural projects.

‍"My background is in the gaming industry and real-time urban planning solutions. My career started with creating computer games for Steam and apps for iOS and Android, then I moved into the urban planning and civil construction planning space utilizing real-time gaming technology to explore and design spaces for government and public projects. I was exposed to the architectural visualization industry, which started to take off…This eventually led me to become a full-time freelancer, and I started RDVIS..."

The studio provides many services but specializes in 3D static images and animation. They also have a full suite of services targeted at architectural projects looking to get off the ground, including web design, marketing prints, design consultation, and their new technology, ArchviewVR, which creates immersive virtual tours.

Breaking out of dependency hell with GarageFarm

Rendering is always a concern for small archviz studios that lack the scale to build their own farm, but are too big to render all their projects locally. To bridge the gap, RDVIS now uses GarageFarm for rendering many of their larger or more complex projects. Almost all of their animations and virtual reality content are rendered in the cloud. They switched to using GarageFarm a few months ago after having some difficulties at other farms.

"We felt like we were being overcharged and not offered support at previous render farms. We would have projects with problems, and not get solutions, and also have to pay 5-10x the price of GarageFarm for a render."

"I have only used GarageFarm for a few months, but so far, I have rendered more projects here than I have with other farms over the last three or so years. GarageFarm makes it so easy to render an animation, and they are the best support and service I have experienced…I would be lost if I didn't find GarageFarm."

The diversity of projects and content RDVIS produces causes their software and rendering needs to stand out from other, more traditional studios. Their team often faces challenges with matching up the software and scenes across their remote work-from-home team and when sending their projects to render. GarageFarm's renderBeamer plugin helps bridge some of these gaps.

‍"We have multiple artists working at RDVIS, and with everyone working from home, it's hard to keep all plugins and software and scenes in exactly the same setups. [Furthermore], we always had different errors with other farms…With our in-house software ArchviewVR, we have to render hundreds of panoramas at 8000px resolution. This would crash on other farms, but with GarageFarm, the render nodes are exactly what we need, and things work the first time so we can meet our deadlines…we have found [GarageFarm to be] the best render service we have used in years!"

New visualization techniques in 3ds Max

The studio's primary software of choice is 3ds Max and Corona, though they also make extensive use of Forest Pack and Railclone for their work. Utilizing the capabilities of these tools, the studio is able to achieve detailed results without spending days or even weeks on manually placing plants or other randomized elements.

As the industry shifts towards higher production values and an increased focus on interactivity, RDVIS is working increasingly more on virtual reality and animation content. In a growing industry, these types of offerings are what can set a studio like RDVIS apart from the already vast competition within the archviz scene.

"We work on 80% client projects and 20% internal marketing projects to showcase our work. Usually, we render Virtual Tours and Animation for projects internally to show our clients and generate more business."

RDVIS' virtual tours allow users to move around room-to-room in a 360° rendered environment interactively. The technology pushes the world of 3D real-estate tours to the next level by allowing prospective buyers or architectural firms to view a space prior to a building being finished, or even started on.

VR, 3D tools, and the future

Looking to the future, RDVIS plans to continue to grow its services to continue providing the best product possible to its clients by improving its skills and service offerings, including its VR offerings.

‍"VR is the next thing for us, ArchviewVR we believe, is the new way to experience off-the-plan developments and explore spaces online…We are also doing and offering more animation for our clients, as we have the confidence to render many frames and meet deadlines now that we have found GarageFarm."

RDVIS will soon launch its online VR platform for other studios to use and create VR tours for their clients. You can learn more about their platform at www.archviewvr.com.au. Their team is also looking at using real-time rendering tools at some point, but they don't believe the emerging technologies will be a silver bullet. They argue traditional rendering tools still offer artists more control over the look and feel of their work.

‍"We feel that things are at a good place now; it will be a few more years before real-time can really take off and become a normal process. But for now, rendering will continue to involve more artist feel and mood to get high-quality emotive feelings for clients."

We want to thank the artists at RDVIS for taking the time to talk with us! To keep up with their team, you can visit their website at www.rdvis.com or on Instagram @rdvis.creative.

---

Originally published at https://garagefarm.net.

The best Cinema 4D plugins

General / 23 January 2023

Creativity is always unfinished business. The more you create, the more refined and accurate your ideas get, and the more you want to experiment and push the boundaries of what you can achieve and how you can visually present your ideas. The quality and level of every specific detail will also grow together with your skills, and you will picture very detailed solutions for every part of your projects, but how do you make tangible what your mind envisions?

You might play with vanilla Cinema 4D until you find a suitable recipe for your desired outcome, or you can leverage plugins made for specific tasks. Thankfully many creators have developed tools that cater to almost any creative need. Some of them deliver a broad range of functions, while others are focused on a specific outcome but nevertheless, they can save you hours and hours of work on what would have otherwise been a laborious effort.

The best Cinema 4D plugins help users improve how quickly they work, their level of control over their projects, or even directly enhance their final renders, but it continues beyond there. To help meet short deadlines or render long animations, services like online render farms often provide plugins that facilitate the transfer of complex projects to cloud-based file servers so that they can be rendered over a network of computers. This is what GarageFarm.NET does. They offer comprehensive support for all C4D versions, commonly used C4D plugins, and a 24/7 support team of experts available via their chat application for any inquiries, questions, or concerns, check out their Cinema 4D render farm.

Here is a list of some of the most useful and widely used C4D plugins.

X-Particles

X-Particles is a fully integrated solution that can help create stunning results in terms of particle creations, smoke, fire and fluids effects, grain and dynamics, and even cloth deformation in ways that the native tools of Cinema 4D cannot achieve. This plugin is currently the most powerful and efficient tool for particle systems, and I wholeheartedly recommend including it in your quiver of tools. This plugin's vast potential allows for much creative exploration and can push the boundaries of simulation-based effects and workflows in Cinema.

The powerful potential of X-Particles is expressed in the number of extra settings that you have access to once you install the C4D plugin. All these controls appear once you import into your scene a new “system” with a new set of emitters and modifiers that can be edited and tweaked, optimizing processes that otherwise would require much more time and complex recipes to achieve. The image below shows an example of the controls you have access to.

An example of many mixed effects created using X-Particles. Image courtesy of Maxon.com

Divider

Another gem among Cinema 4D plugins that I recommend is Divider.

Developed by Aleksei Karpik, this plugin is perfect for loop creations and procedural subdivisions, themes that have been very popular lately in advertising and content creation. Whether you need to generate visual interest with graphic elements or promote or launch a new product on social media, this is the perfect tool to create appealing, repeated, and seamless effects with just a few clicks. Plus, the plugin is entirely free!

An example of procedural polygon division for graphic purposes. Image courtesy of Aleksei Karpik. 

Hot4D and Houdini

I've always been fascinated by irregular and organic shapes and effects. Some time ago, I created an ocean animation with a floating effect against the light of a sunset. Back then, I didn't know I could use Hot4D to make the ocean surface and waves, which would have allowed me to quickly manipulate factors like wind speed and direction on the water's surface, wave height, and much more.
Example of the ocean created without Hot4D. Image courtesy of Sabrina Facchetti

Example of the ocean created with Hot4D. Image courtesy of Justin Marimon  

This is an example of how a similar result can be achieved with or without plugins. Of course, in my project's case, the goal was to create a calm and relaxing ocean-totally doable using the tools that Cinema 4D provides. If I had to make a much more realistic and detailed water surface next time, I would definitely rely on this plugin.

The name is an acronym for Houdini Ocean Toolkit, which means this tool works in combination with another plugin: Houdini.

Houdini for C4D

Houdini for Cinema 4D is a plugin or, better, an engine integration that allows C4D to work more procedurally. When you have to create repetitive tasks, projects with high-complexity geometry, simulations, huge particle counts, and tool-building, Houdini is the perfect tool to manage this amount of data. 

Being a procedural plugin means that every step of the creation process can be accessed and edited anytime during the creative process and that each “ingredient of the recipe” can be substituted with a different or more appropriate one allowing full creator control at any moment of the process. Visually all these aspects are represented by “nodes.” Nodes are all the components of your scene or effect; they can connect to each other in a specific way to trigger a specific result, and the more you combine them, the more the complexity of your project grows. And this is how Houdini can manage even huge amounts of particles and elements smoothly.

Below is an example of a table created using Houdini procedural processes and a visualization of the component nodes and their relationships.

Image courtesy of Eosacro

Houdini is also very well known for having fantastic simulation effects, like Houdini Ocean Toolkit that we just covered above, that can be used to create anything from realistic to abstract/other-worldly simulations. 

An example of stunning and complex futuristic creation designed with Houdini. Image courtesy of Vinicius Araùjo.

Whatever kind of creative you are, Cinema 4D and the broad repertoire of third-party C4D plugins and tools can support and even boost your creativity. Have fun navigating the pool of Cinema 4D's plugins and finding the right ones for your needs!

-----

‍Written by Sabrina Facchetti

Originally published at https://garagefarm.net.